Navigation Operation
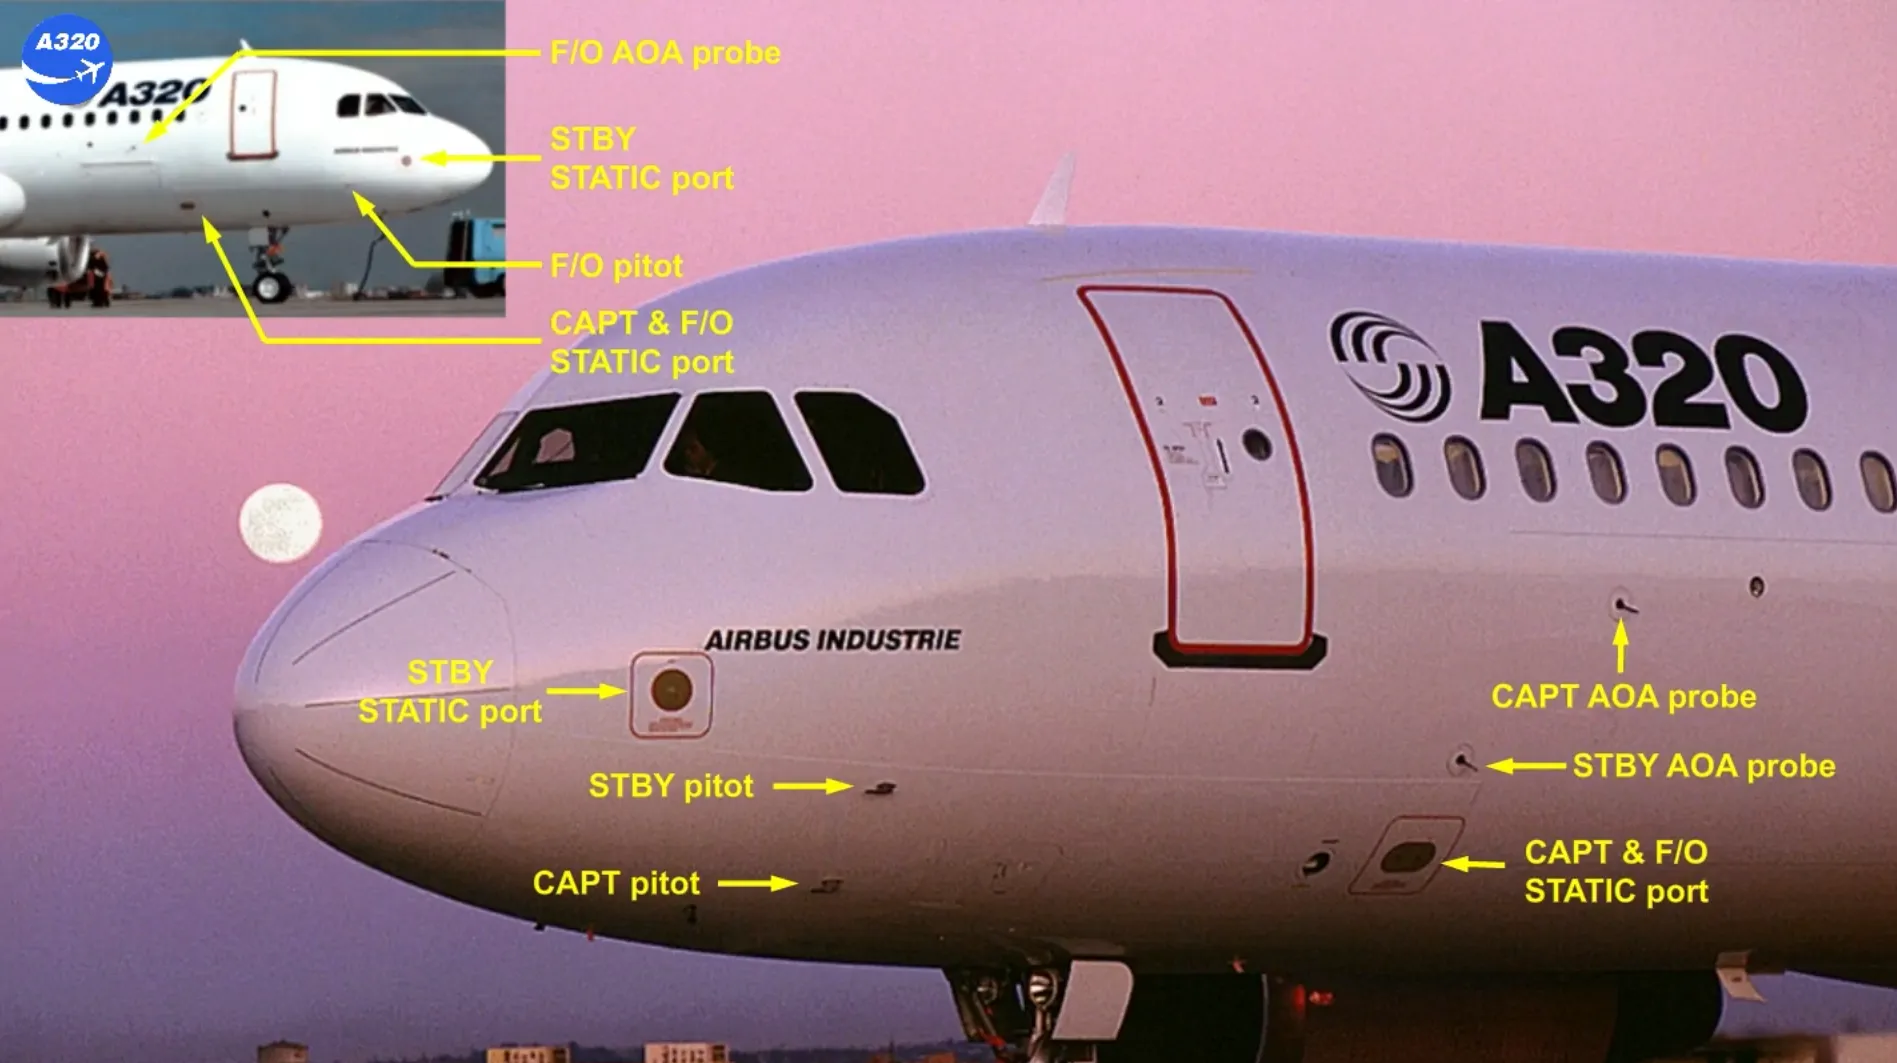
During the exterior inspection, you have to check the condition of:
- The 3 Angle Of Attack (AOA) probes
- The 2 CAPT & F/O static ports
- The 3 pitot probes
- The 2 STBY static ports …
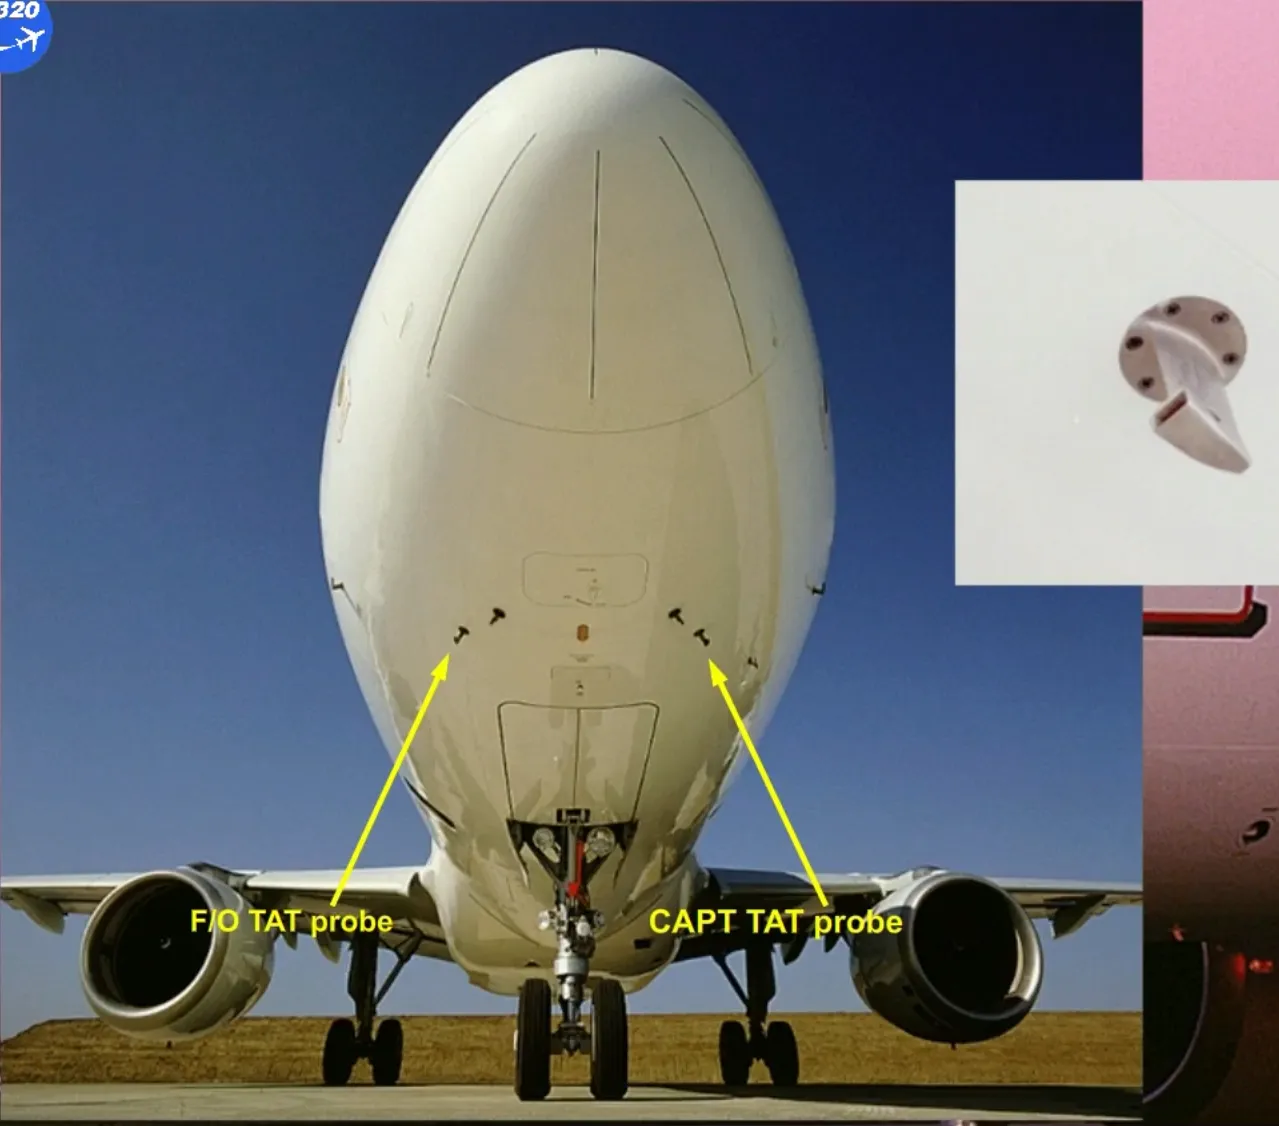
- The 2 total air temperature (TAT) probes and …
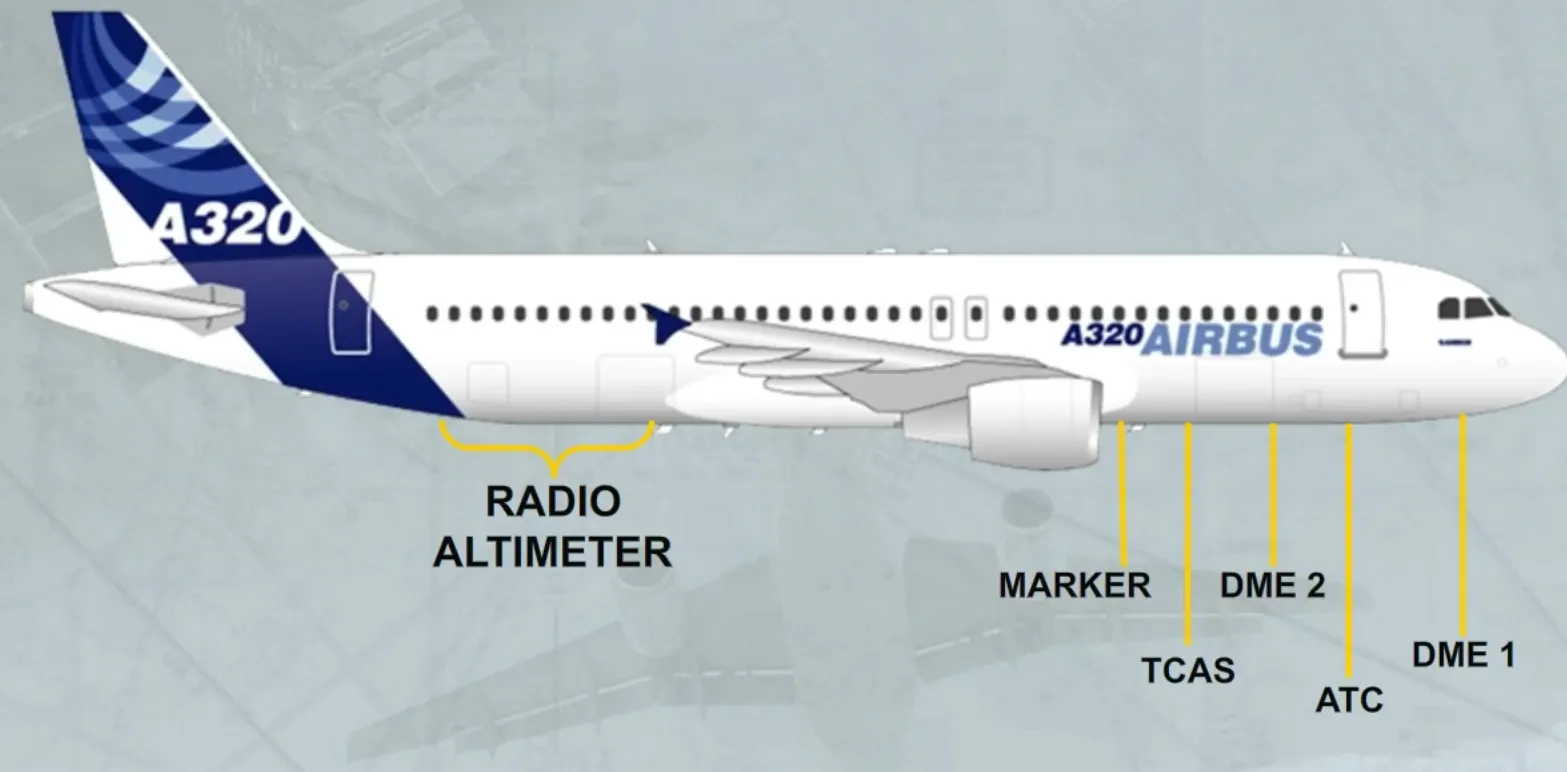
- The different navigation antennas located at the lower center fuselage.
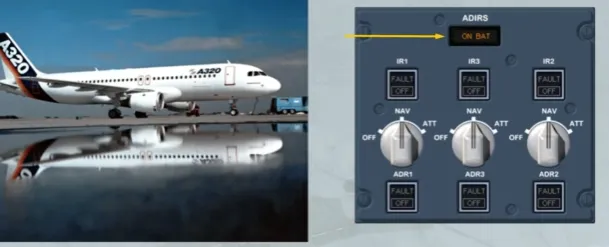
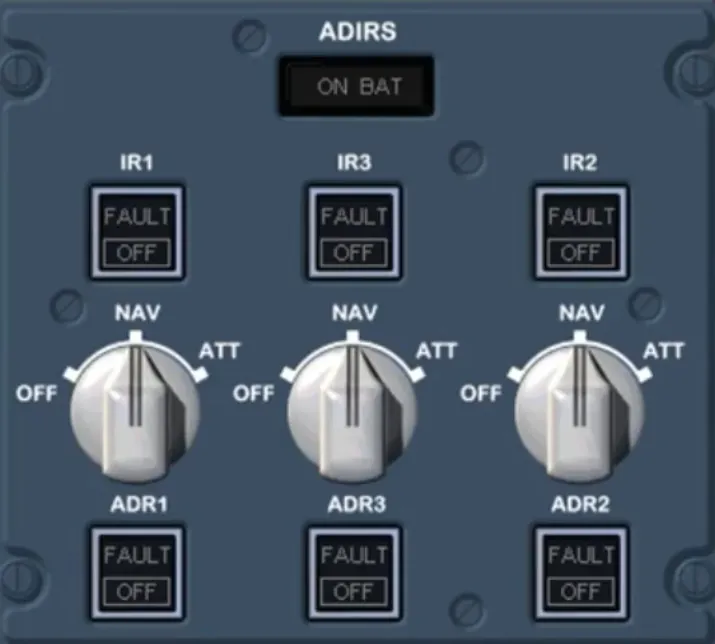
Then, as the electricity has been already connected, the pushbutton switches on the ADIRS panel must be checked in the lights out position.
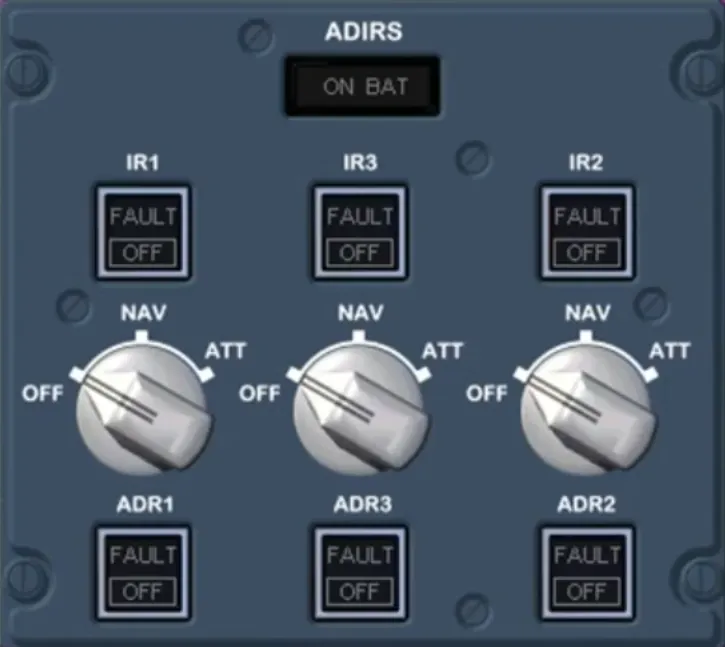
Then the selectors must be set to NAV as soon as possible, in order to provide the different aircraft systems with the ADIRS data.
So, we will do it for you.
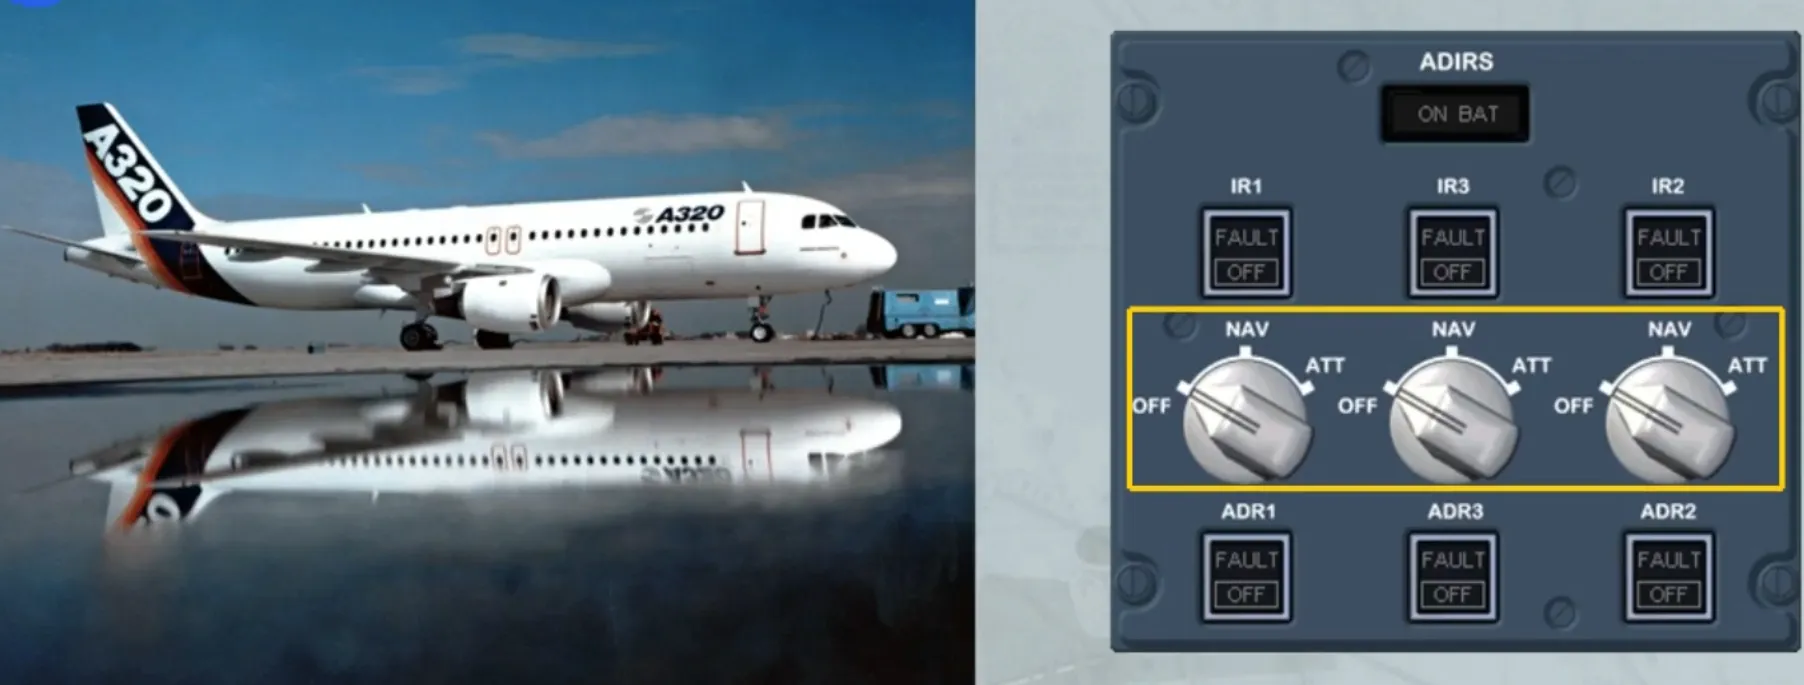
When the selectors are set from OFF to NAV, a complete alignment process is launched.
A complete alignment must be performed if:
- It is the first flight of the day, or
- The GPS is not available and long segments are in poor NAVAID coverage.
The amber ON BAT light comes on for few seconds, only at the beginning of a complete alignment, as a test of the battery circuit.
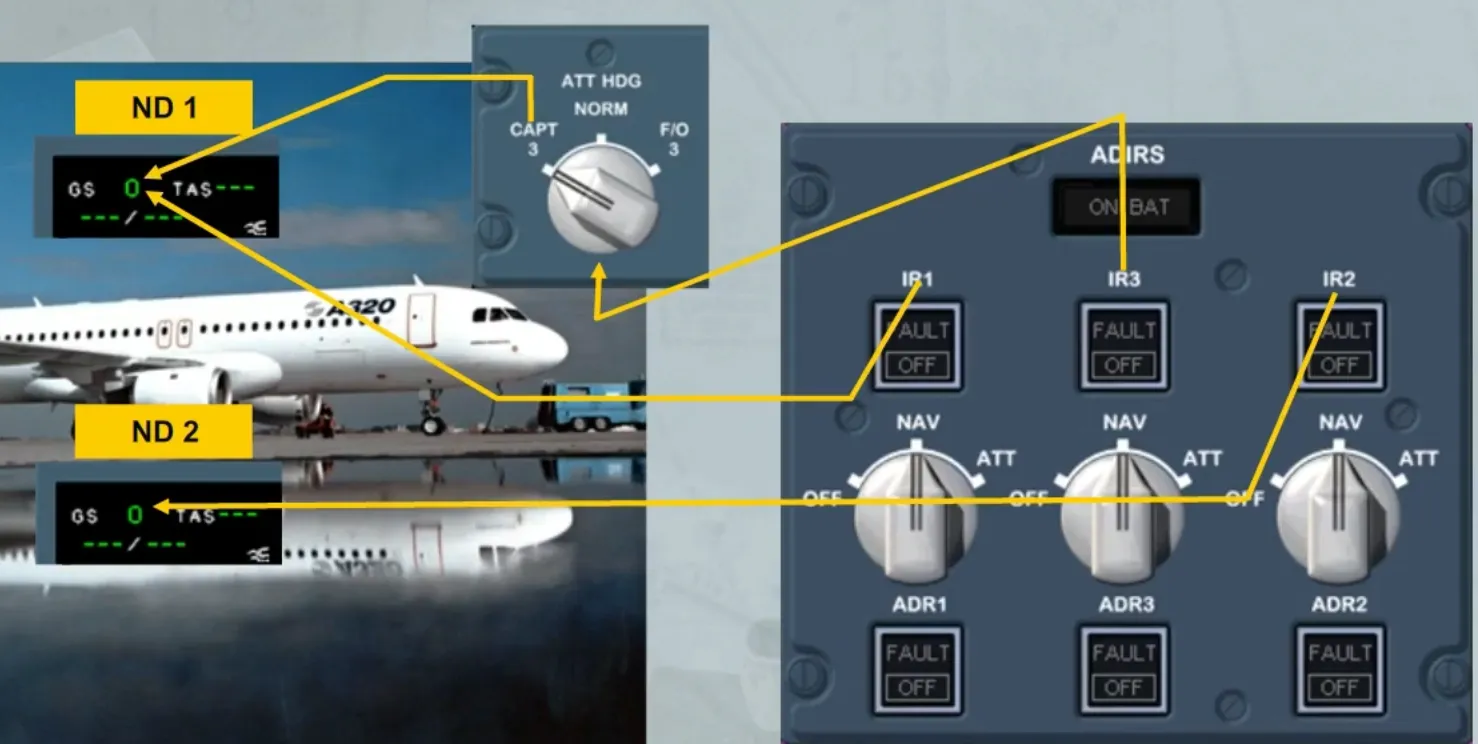
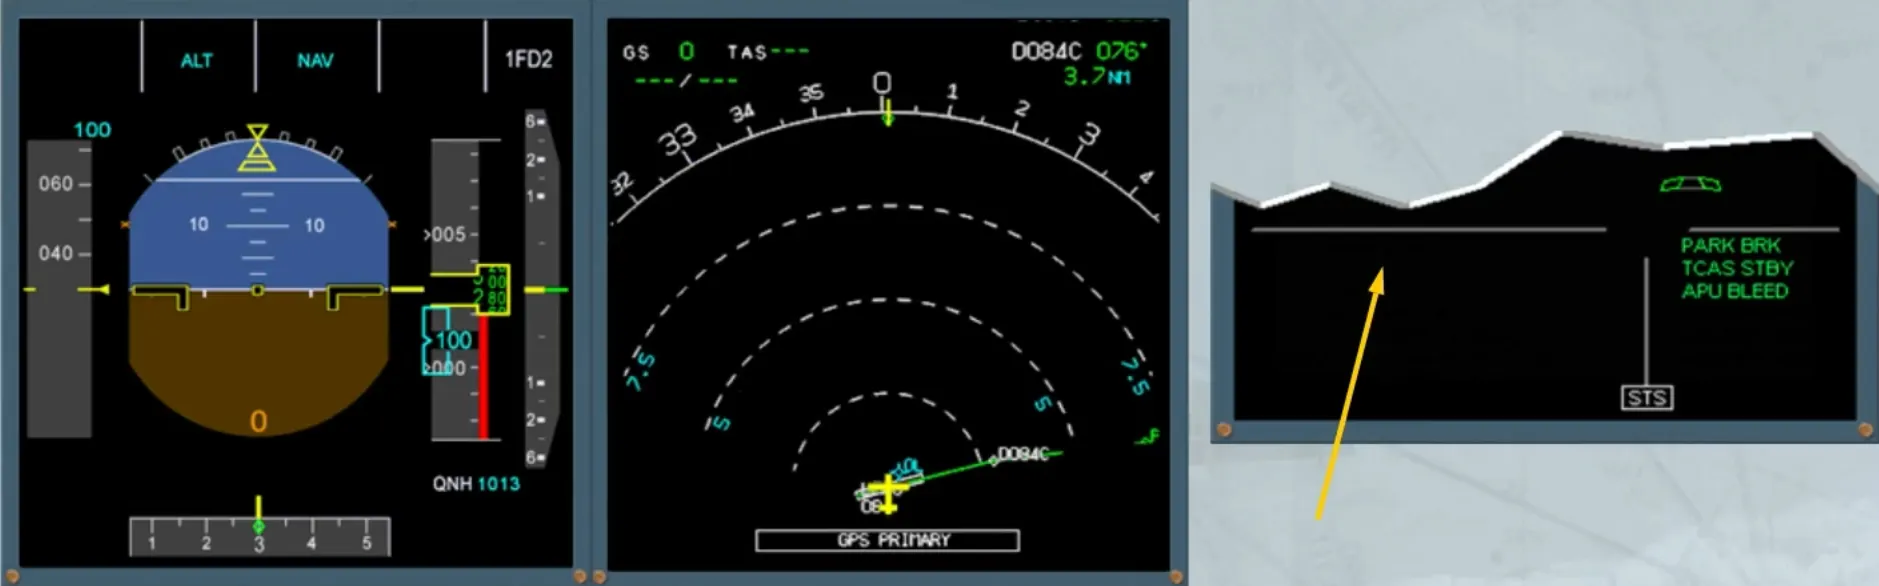
For other flights, a fast alignment is necessary only if the residual ground speed is greater than 5 kt, displayed on the related ND for IRS 1 and 2, and on the ND 1 for IRS 3 by switching the ATT HDG selector to CAPT 3.
A fast alignment is performed by setting the three selectors to OFF, then within 5 seconds back to NAV.
This resets the ground speed to zero.
Note: A complete alignment will take around 10 minutes and a fast alignment will take around 30 seconds.
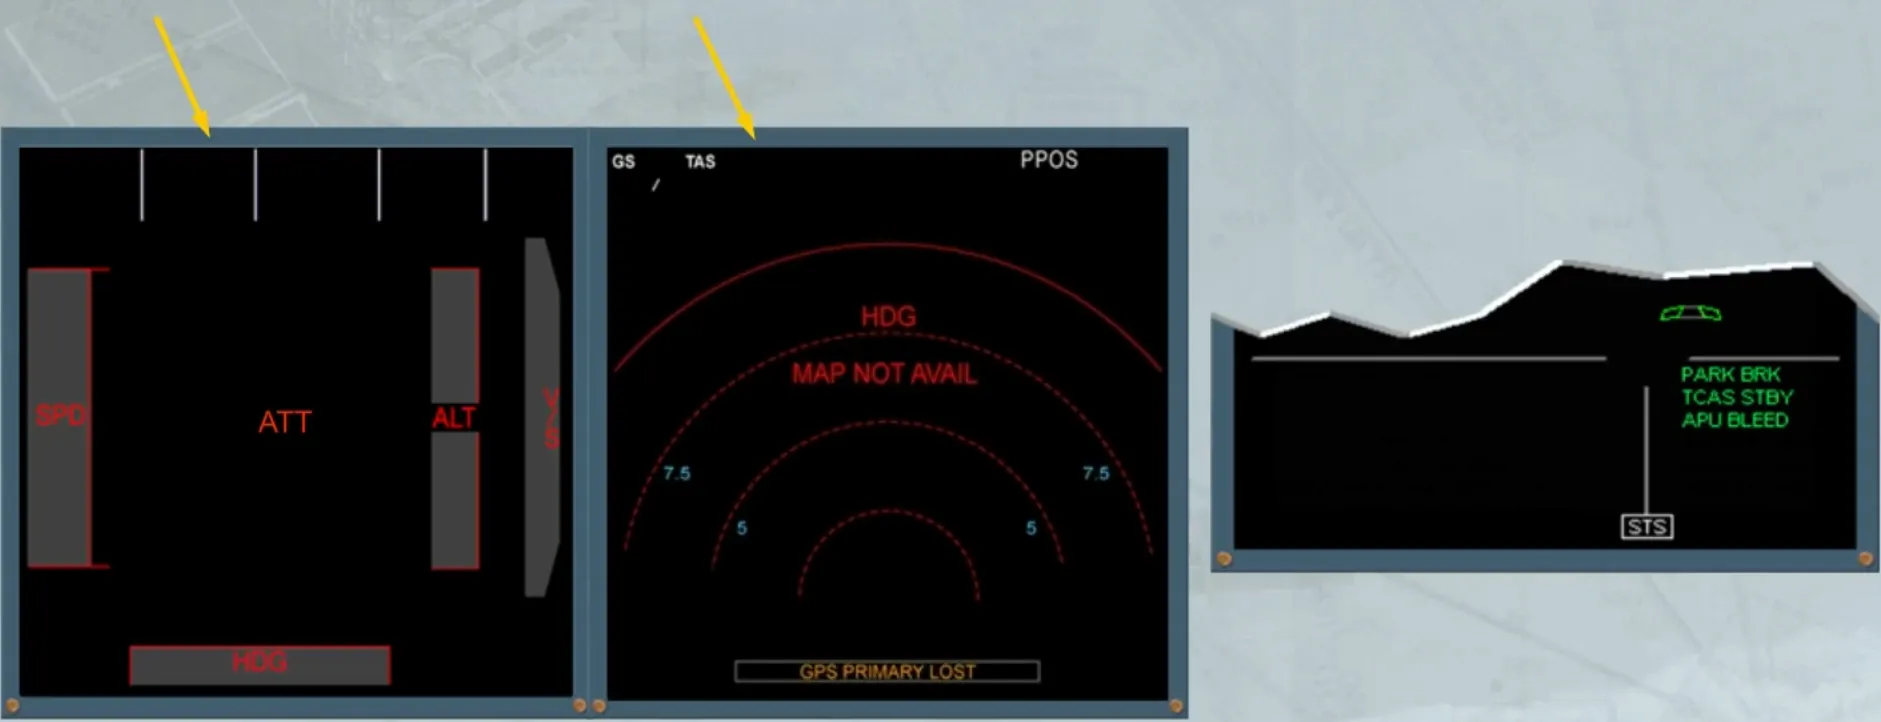
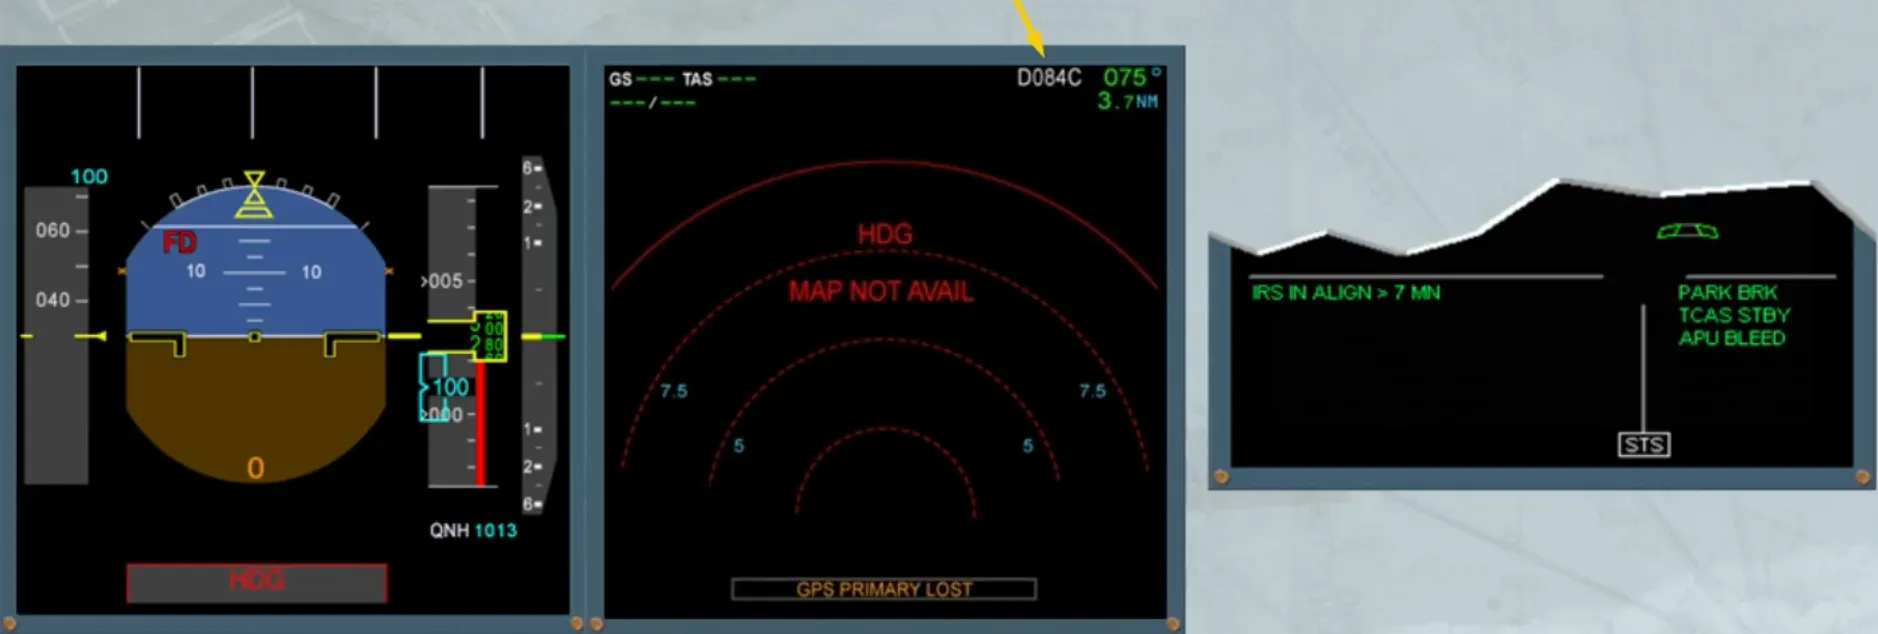
Few seconds after the electricity has been connected, the PFDs and NDs display red flags as shown, until the ADIRS selectors are set to NAV.
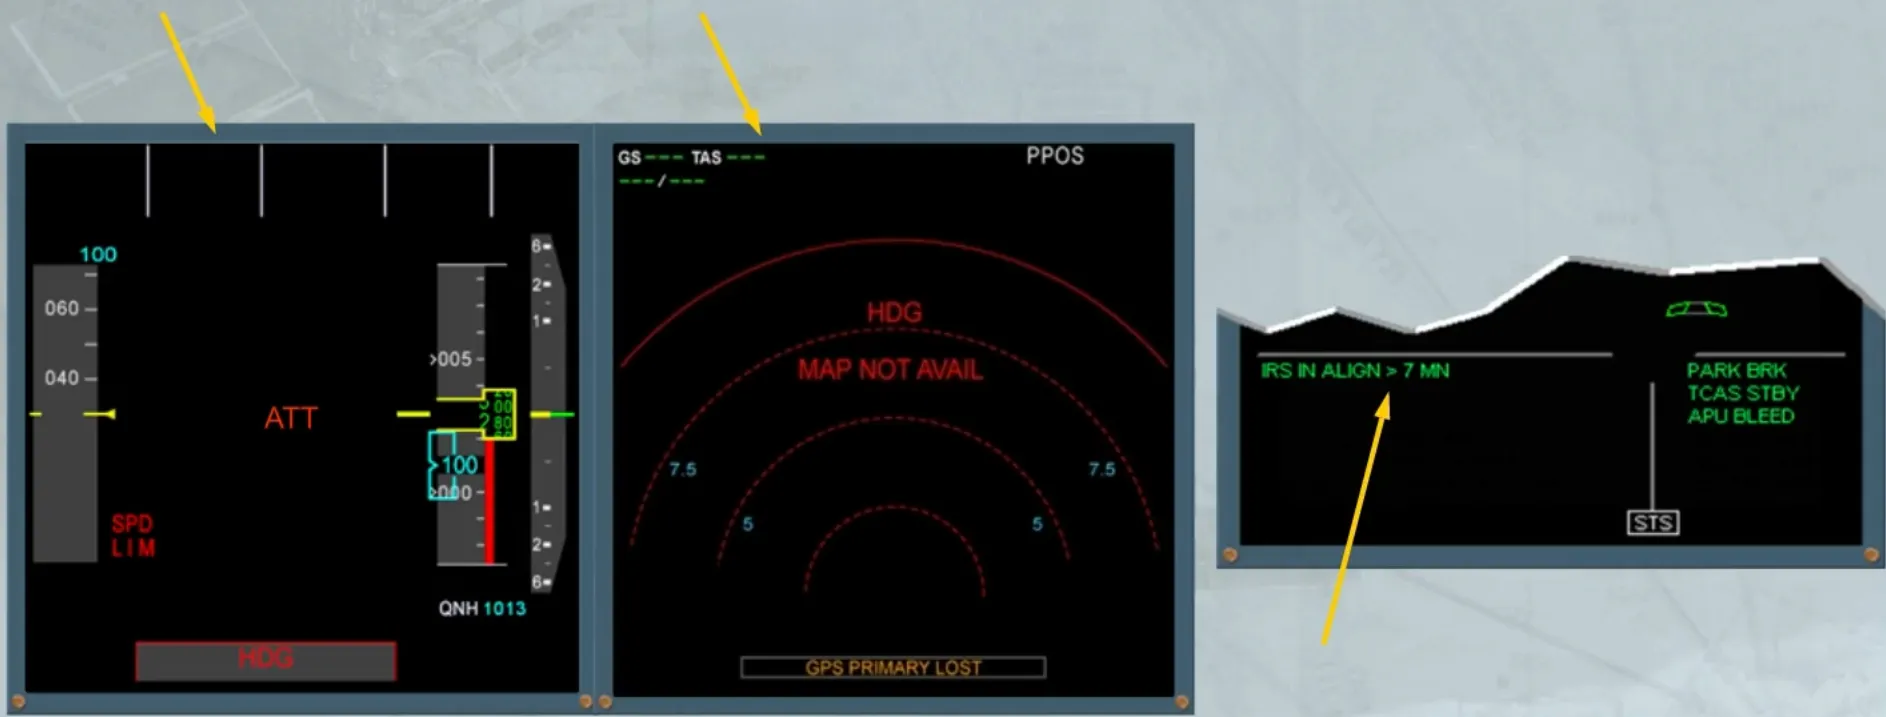
As soon as the ADIRS are set to NAV, a green memo message appears. It indicates that the alignment process has started. This is also indicated by the change on the PFDs, showing the data from the ADRs. Then, after few seconds, the PFDs show the attitude data.

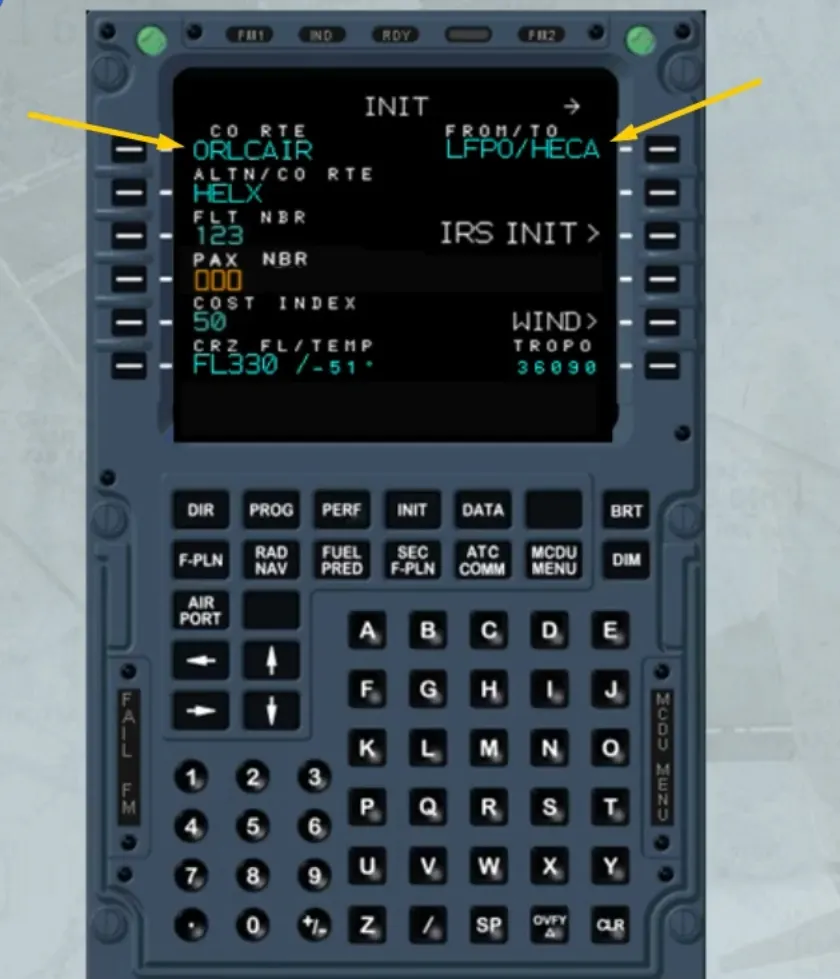
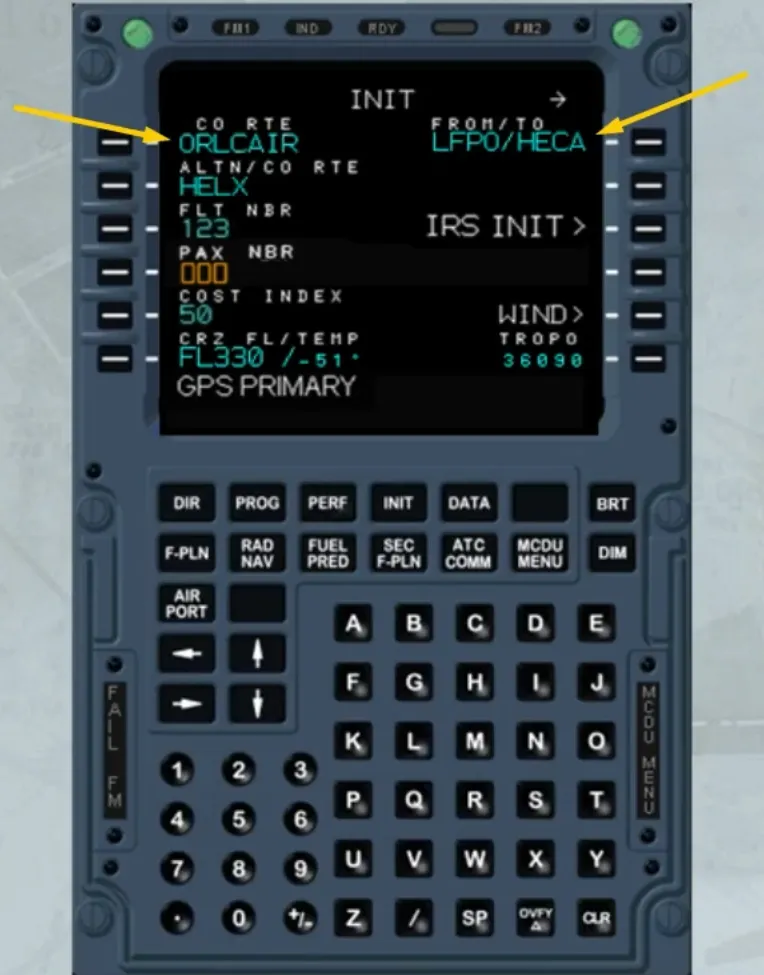
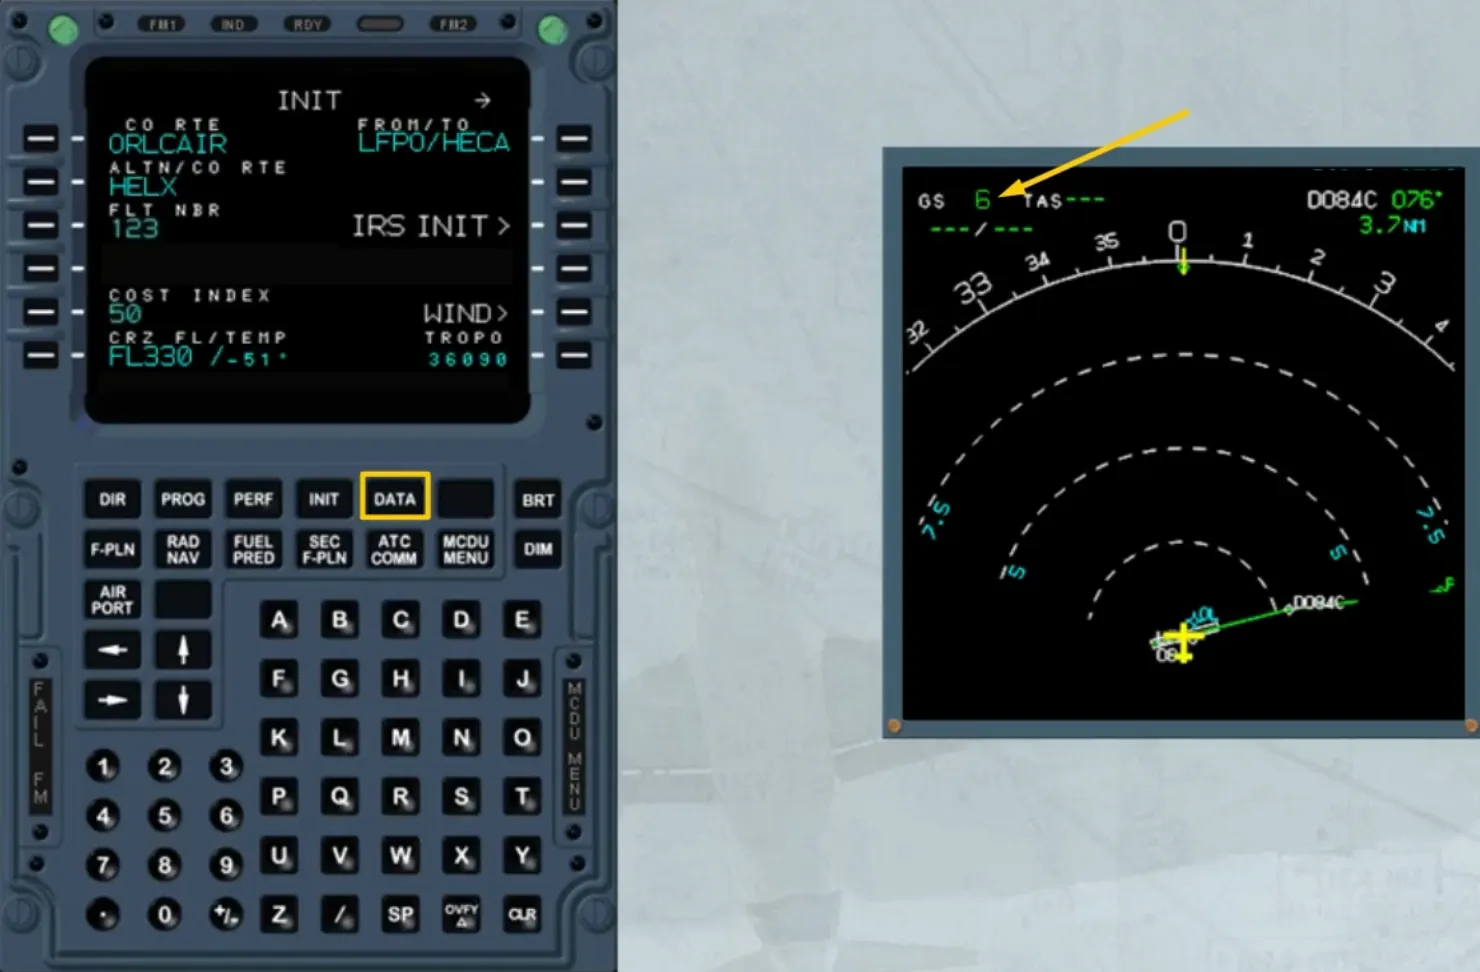
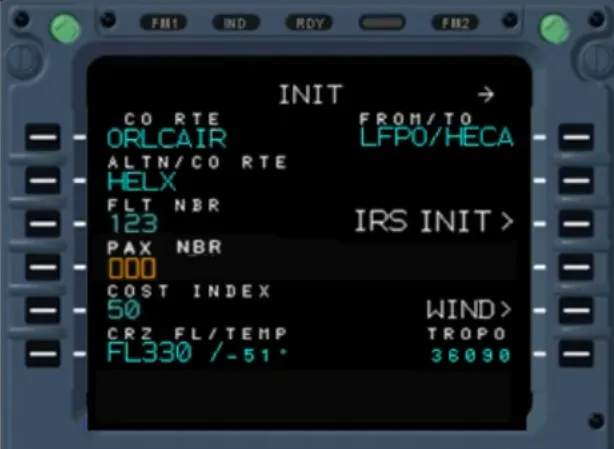
Then, you have first, to enter a company route code or a city pair (ICAO codes for city of origin and destination) in the INIT A page of the MCDU.
When the GPS is available, the position initialization is automatic.
The GPS position will be used by the IRSs without pilot intervention.
However automatic initialization can be manually overridden by the pilot at any moment during the alignment phase.
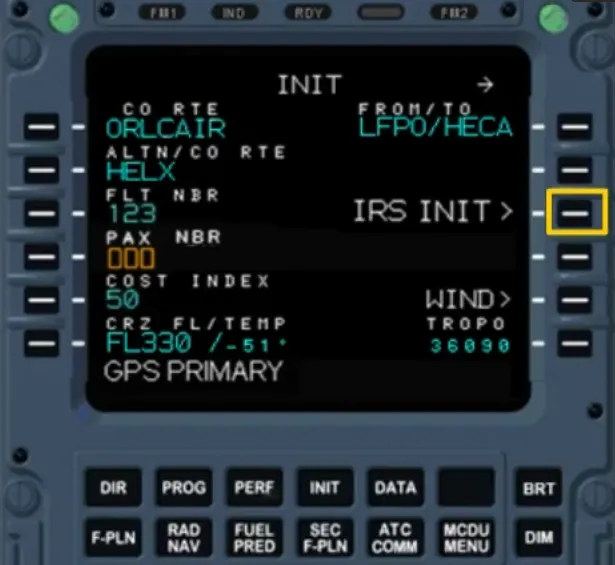
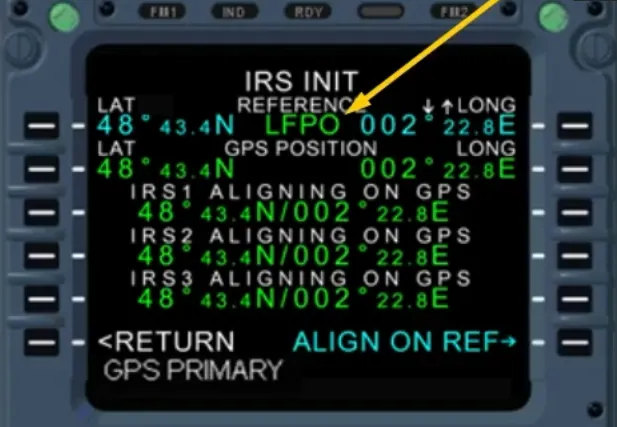
You access the IRS INIT page by pressing the IRS INIT> key.
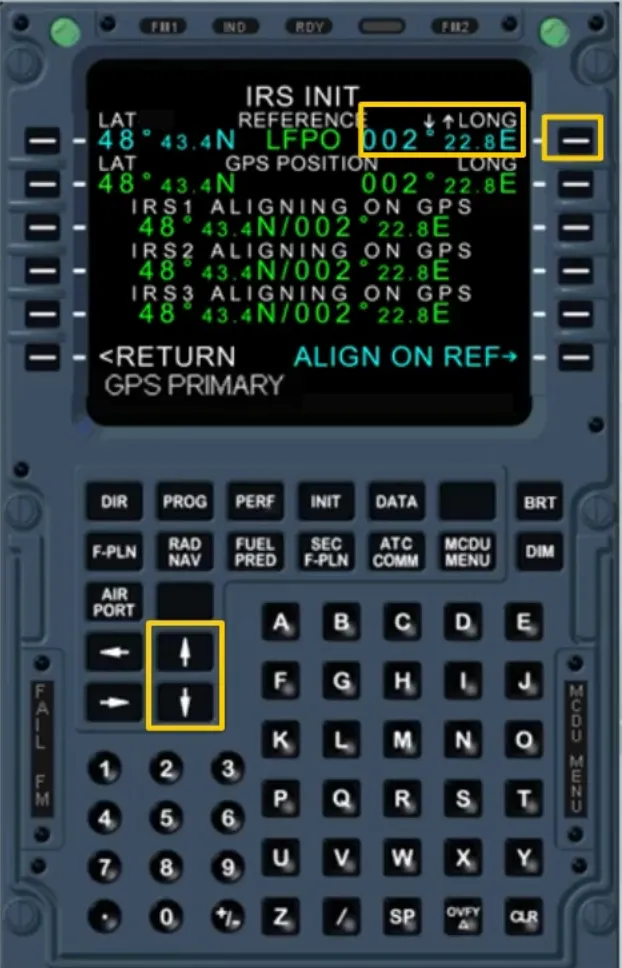
The latitude and longitude shown in this page are those of the departure airport’s reference point, coming from the data base.
If necessary, the latitude can be adjusted by using the UP and DN scroll keys. Also the longitude can be adjusted but before using the scroll keys the 1R key must be pressed, in order to transfer the UP/DN symbol, as shown. This can be used to enter the gate precise coordinates.

Note: If the coordinates match with the airport reference point, the airport identifier is displayed in green. Otherwise it is replaced by dashes.
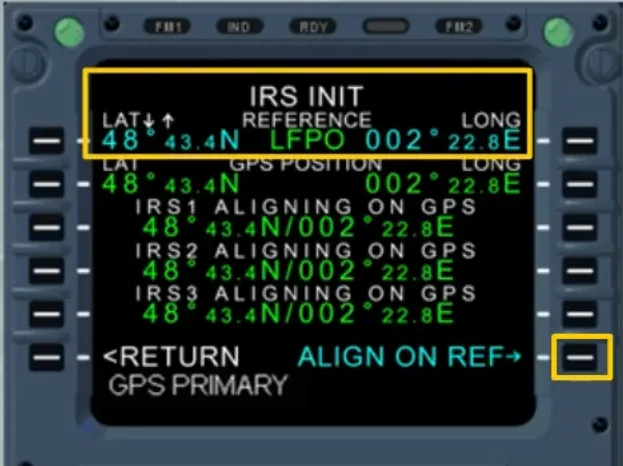
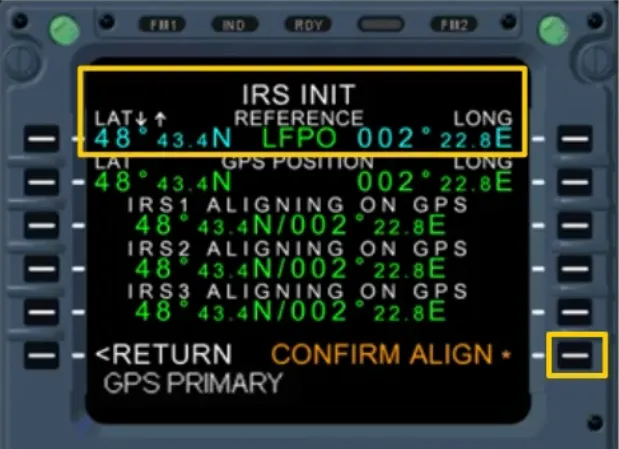
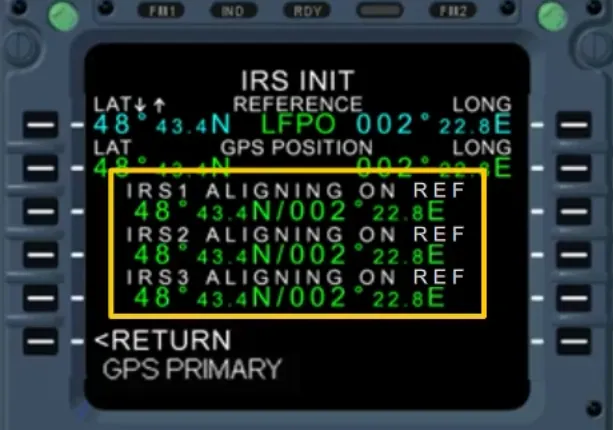
To initialize the ADIRS with the displayed coordinates, the ALIGN ON REF prompt key must be pressed. This changes to CONFIRM ALIGN prompt. If it is pressed again the coordinates displayed on the line 1 are sent to the IRSs. This is confirmed by the IRS ALIGNING ON REF, as shown.
When a city pair has been entered on the MCDU, the indication at the top right corner changes as shown.


When a SID has been entered the TO WPT is displayed as shown.
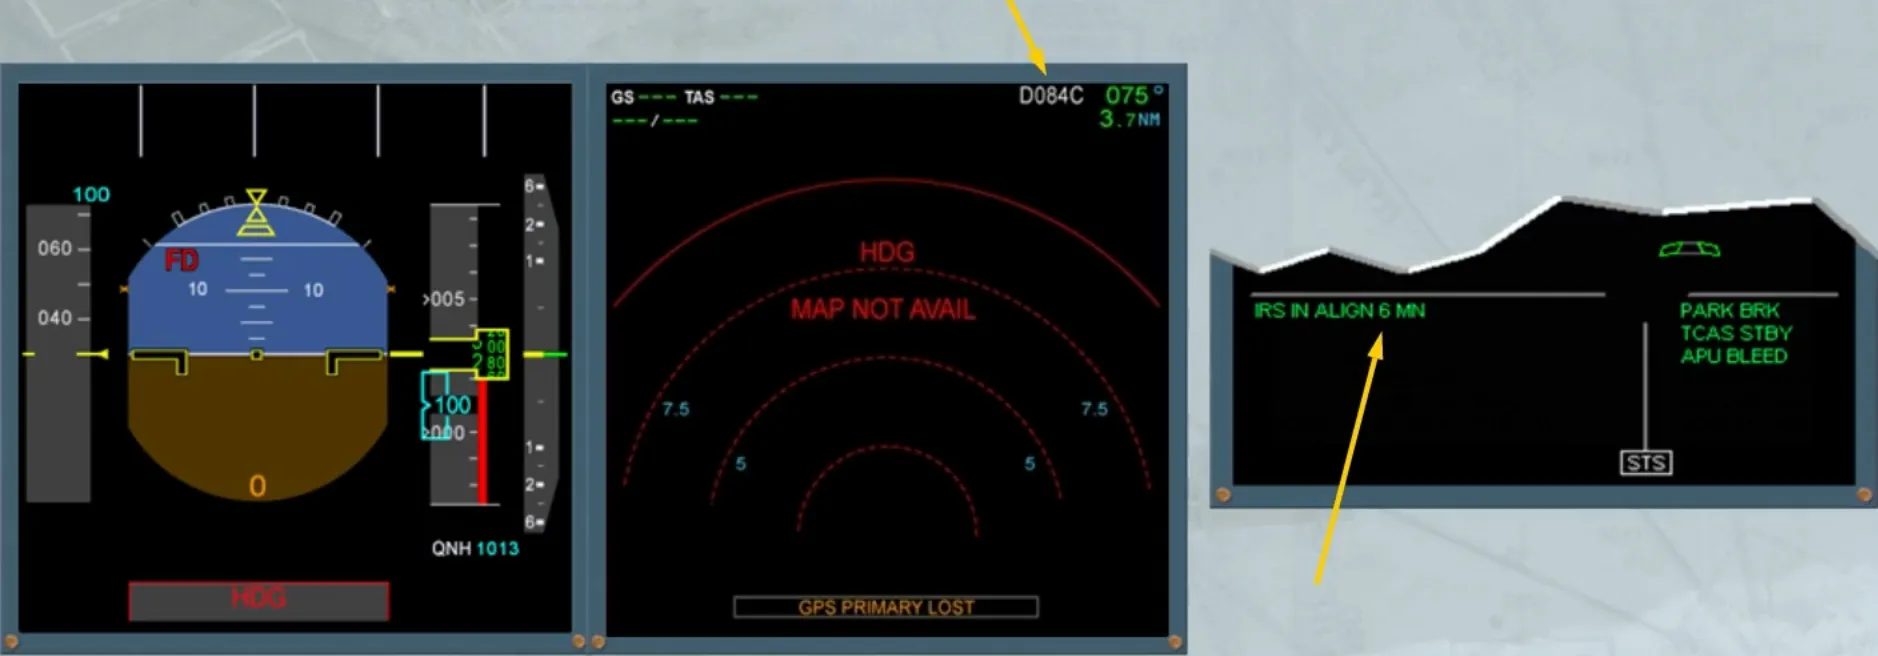
4 minutes after setting the ADIRS to NAV, the “IRS IN ALIGN” message on the E/WD counts down the time remaining until full alignment is completed.
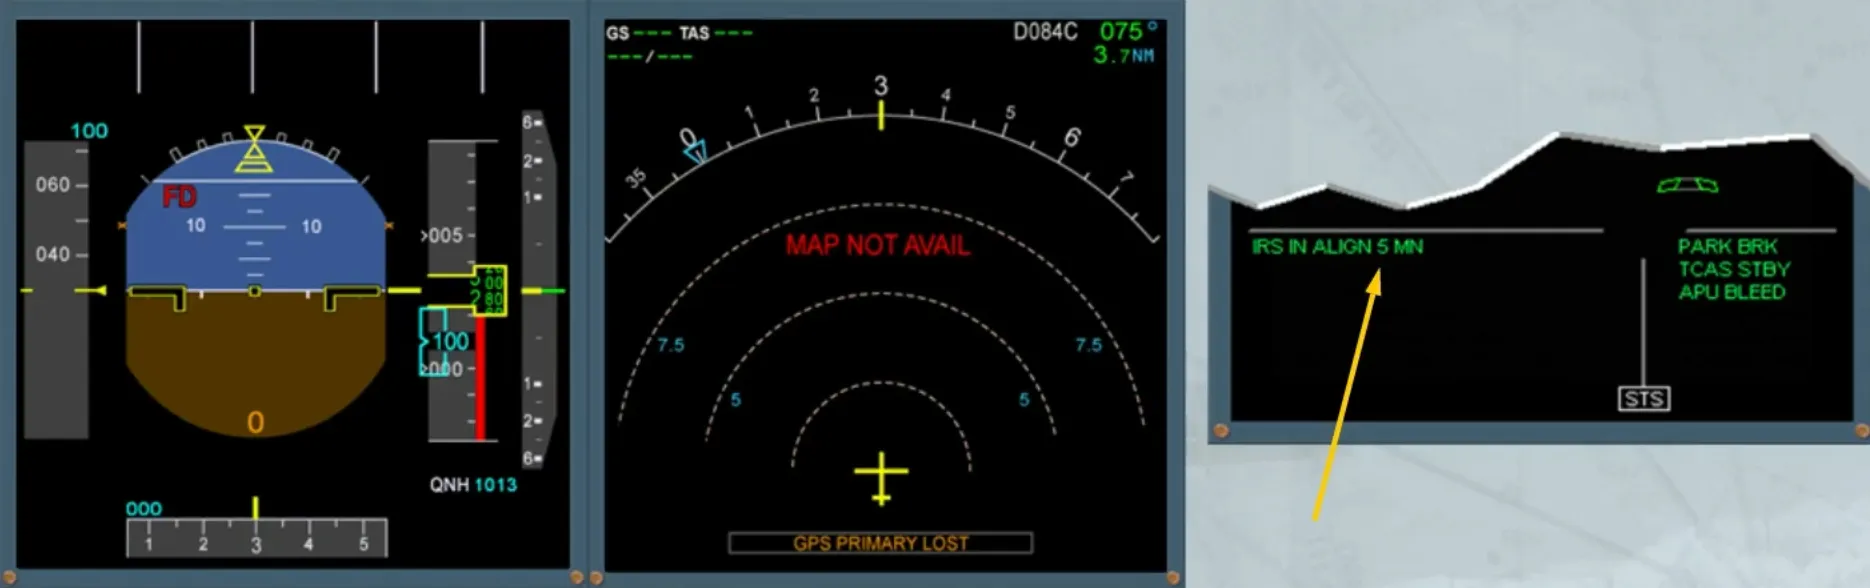
Then, few seconds after, the heading information is provided, as shown.
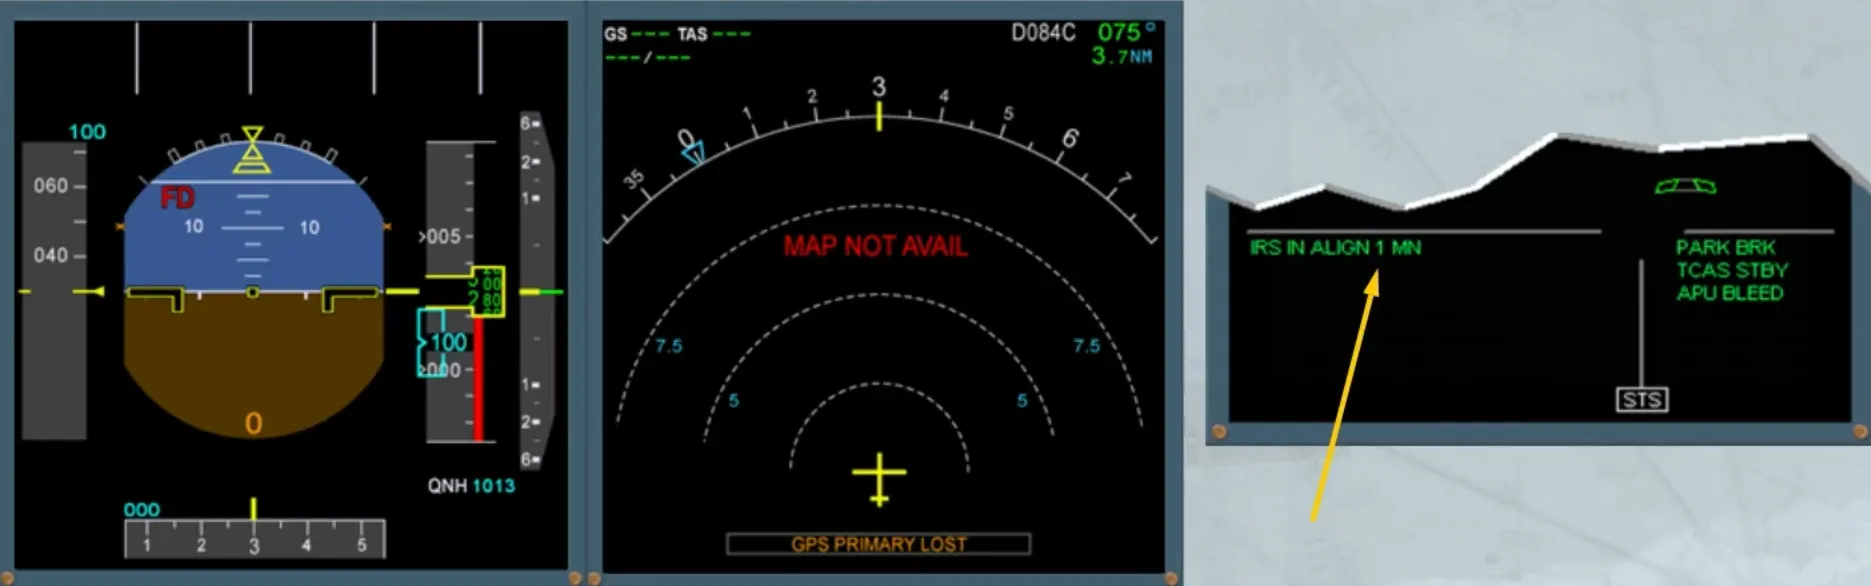
Then, when the countdown has reached 1 minute, it remains displayed until NAV mode is activated, as shown.
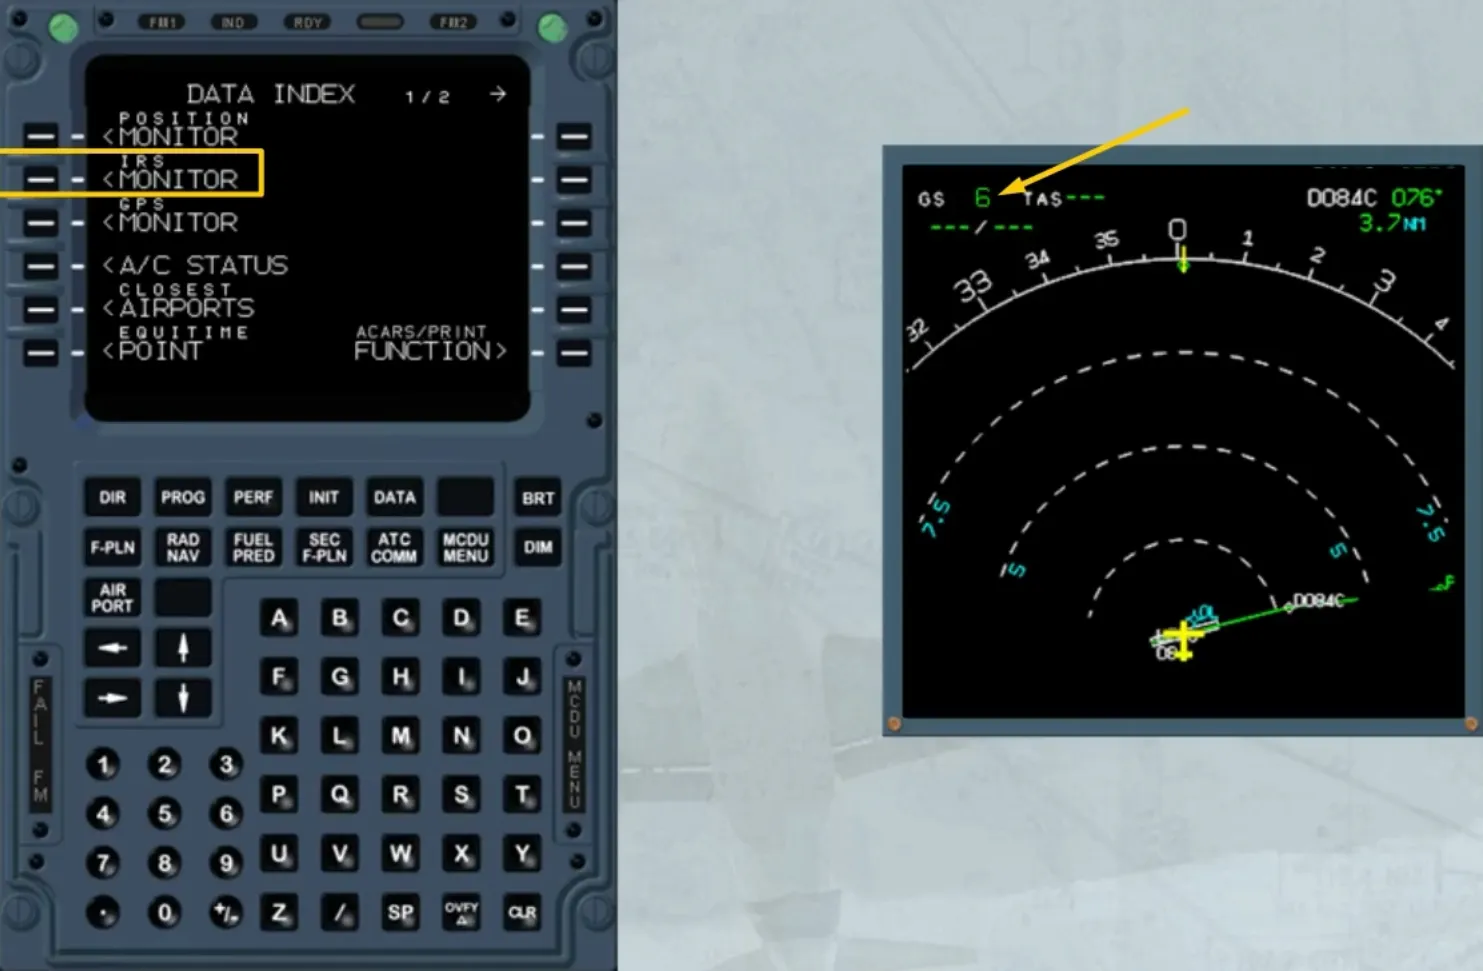
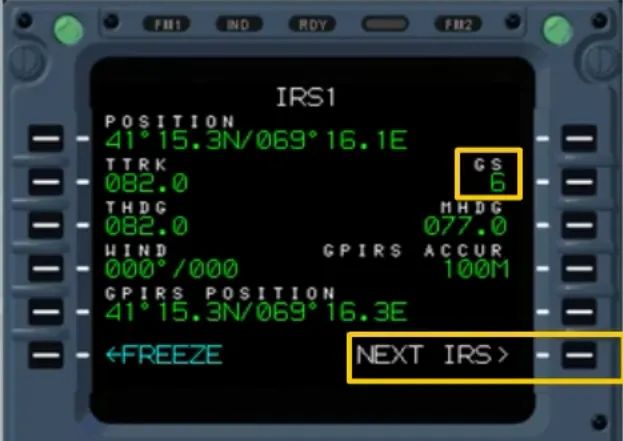
Occasionally, during a turn around, a residual ground speed can necessitate an IRS rapid realignment. This information is displayed on the related ND, as already explained, but it is also accessed through the IRS MONITOR page. For that, the DATA INDEX page has to be called up on the MCDU, and the relative LSK must be pressed.
Selecting one of the IRS gives access to its specific page.
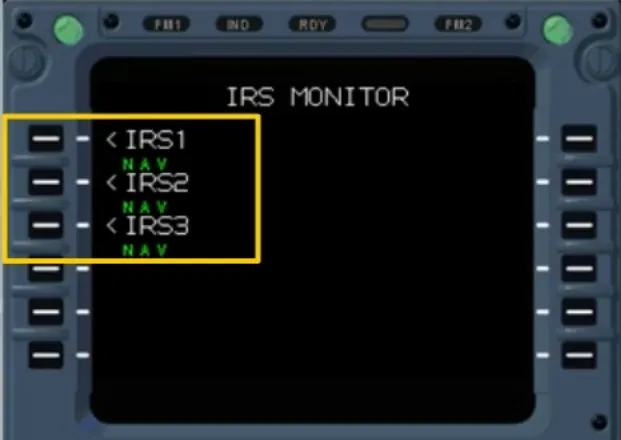
From this page, you can check the residual ground speed of IRS 1, then access the other IRSs.
To carry out a rapid alignment, all three mode selectors have to be switched off, then on within 5 seconds.
Otherwise a complete alignment will take place and the ON BAT light will come on for few seconds.
Also during a fast alignment, the ADIRS residual ground speed resets to zero. Therefore, the ADIRS will start the position computation with an accurate initial speed.
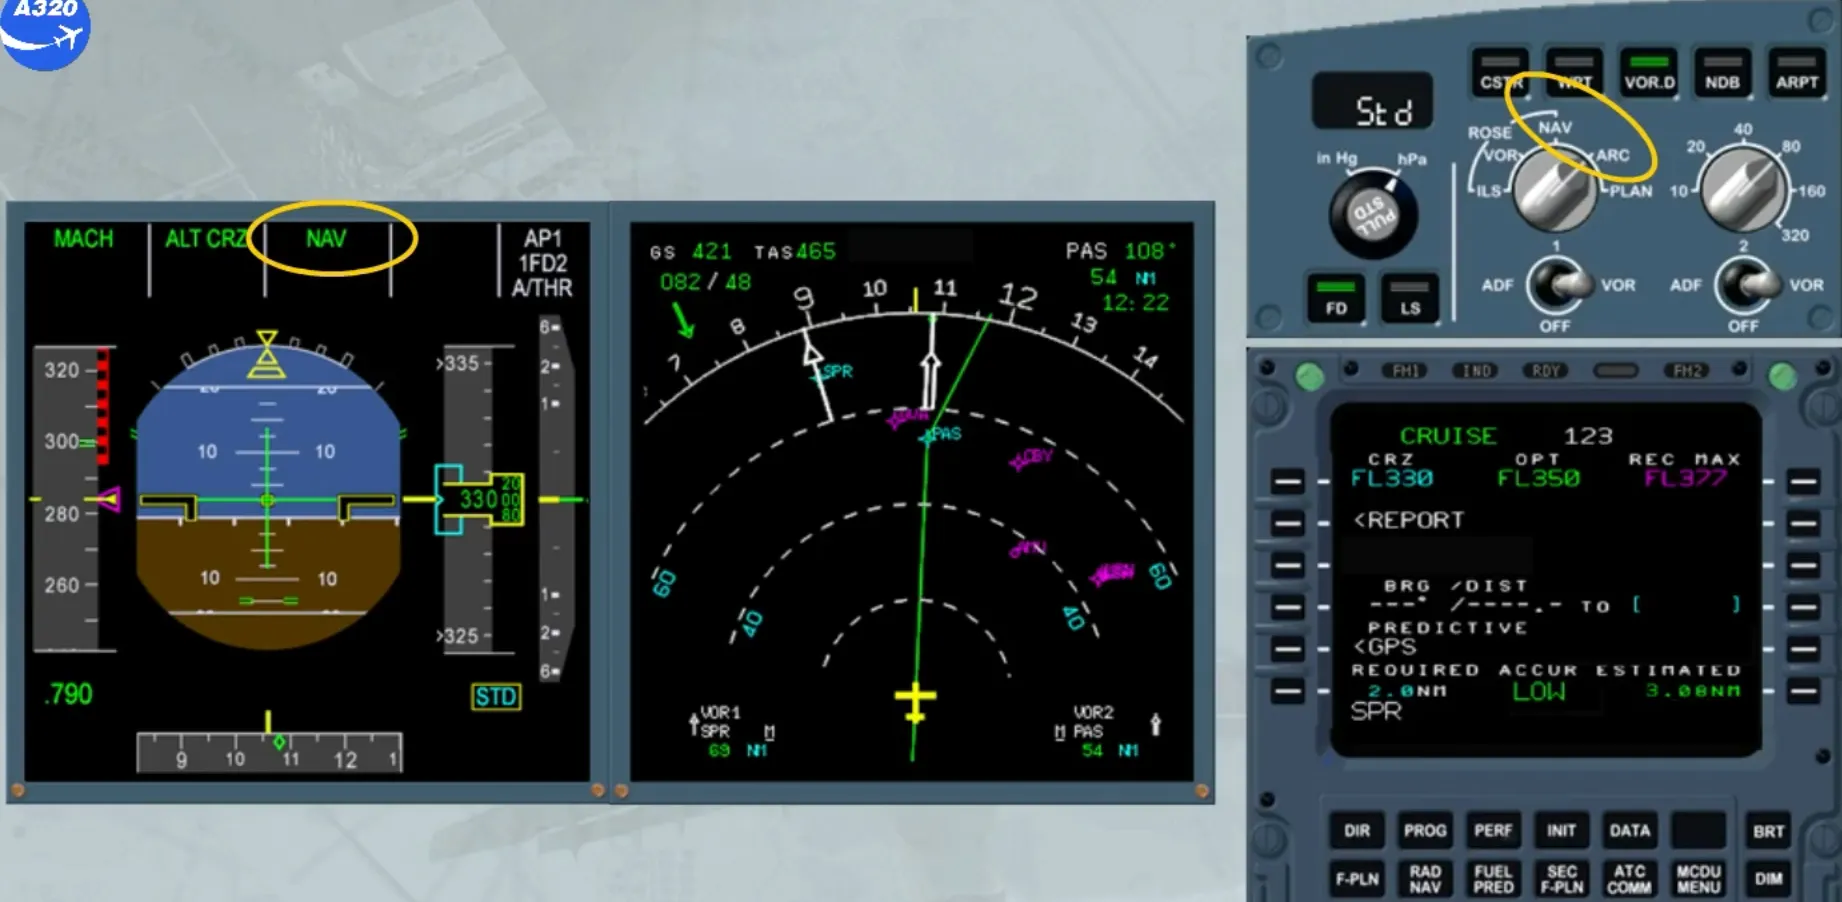
We are now in cruise flight. If the aircraft is not equipped with GPS, or if GPS PRIMARY is not available, the navigation accuracy check must be performed.

The indication “NAV ACCUR UPGRAD” has appeared at the bottom of the ND and in the MCDU scratchpad meaning that the navigation accuracy level has automatically switched from LOW to HIGH.
We will see now how to perform a navigation accuracy check.
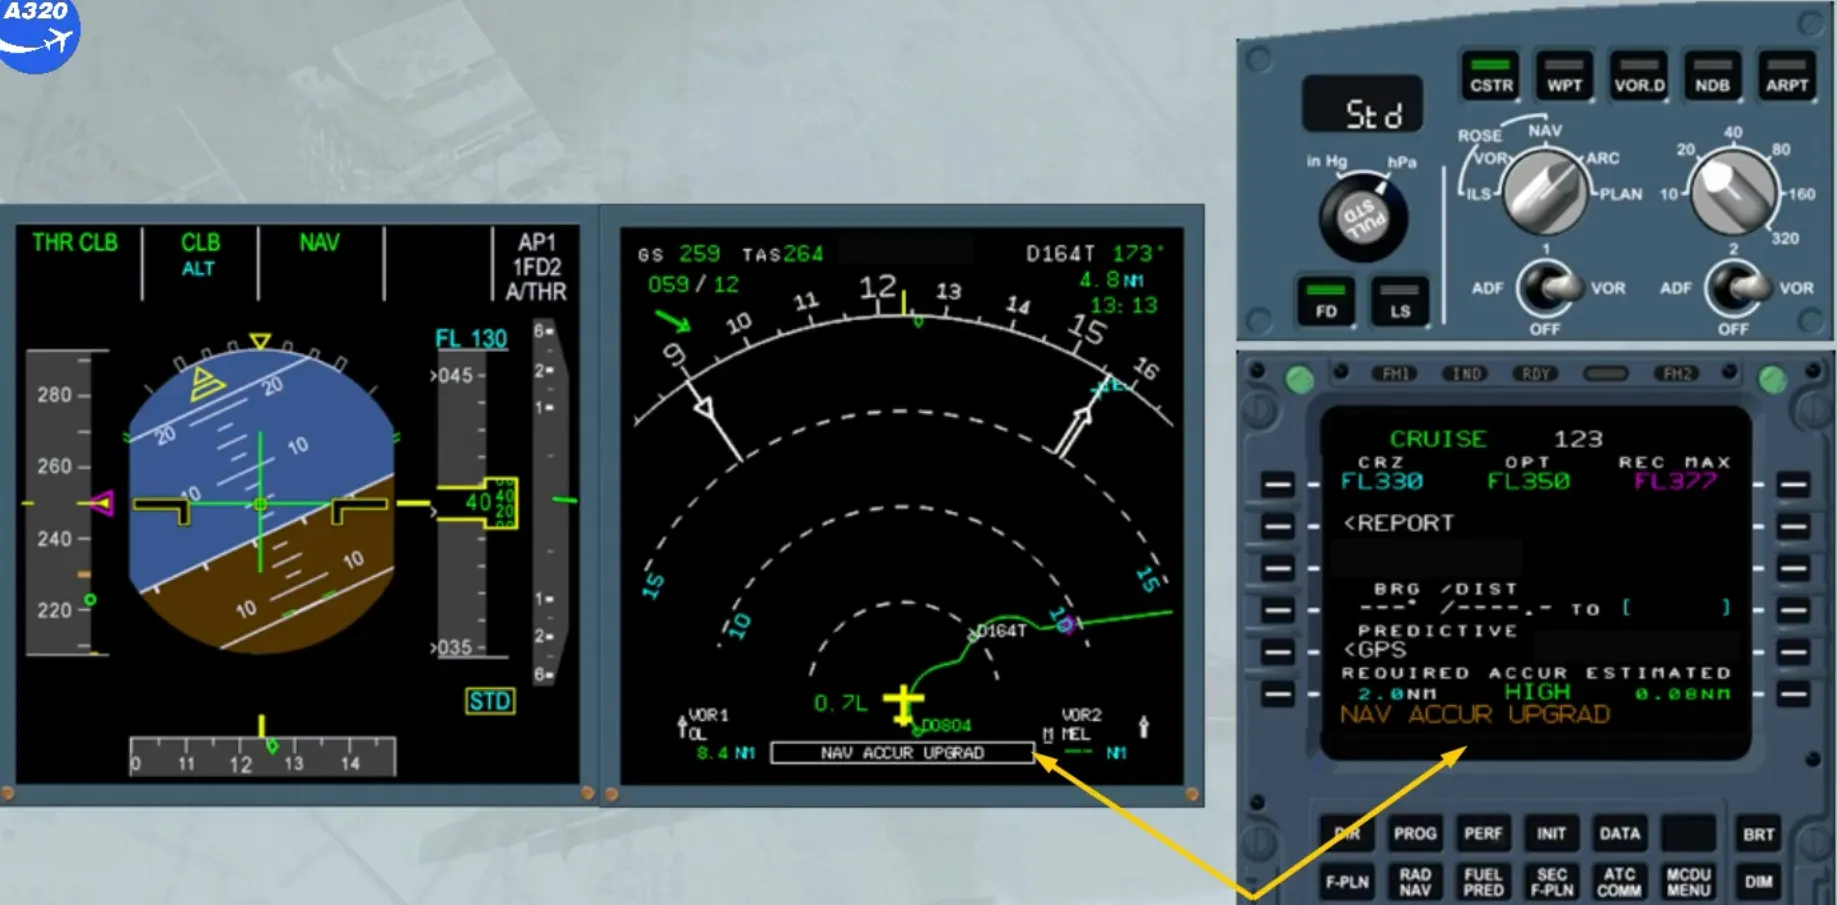
The objective of the navigation accuracy check is to compare the raw data from the tuned navaids with the corresponding FM computed data.
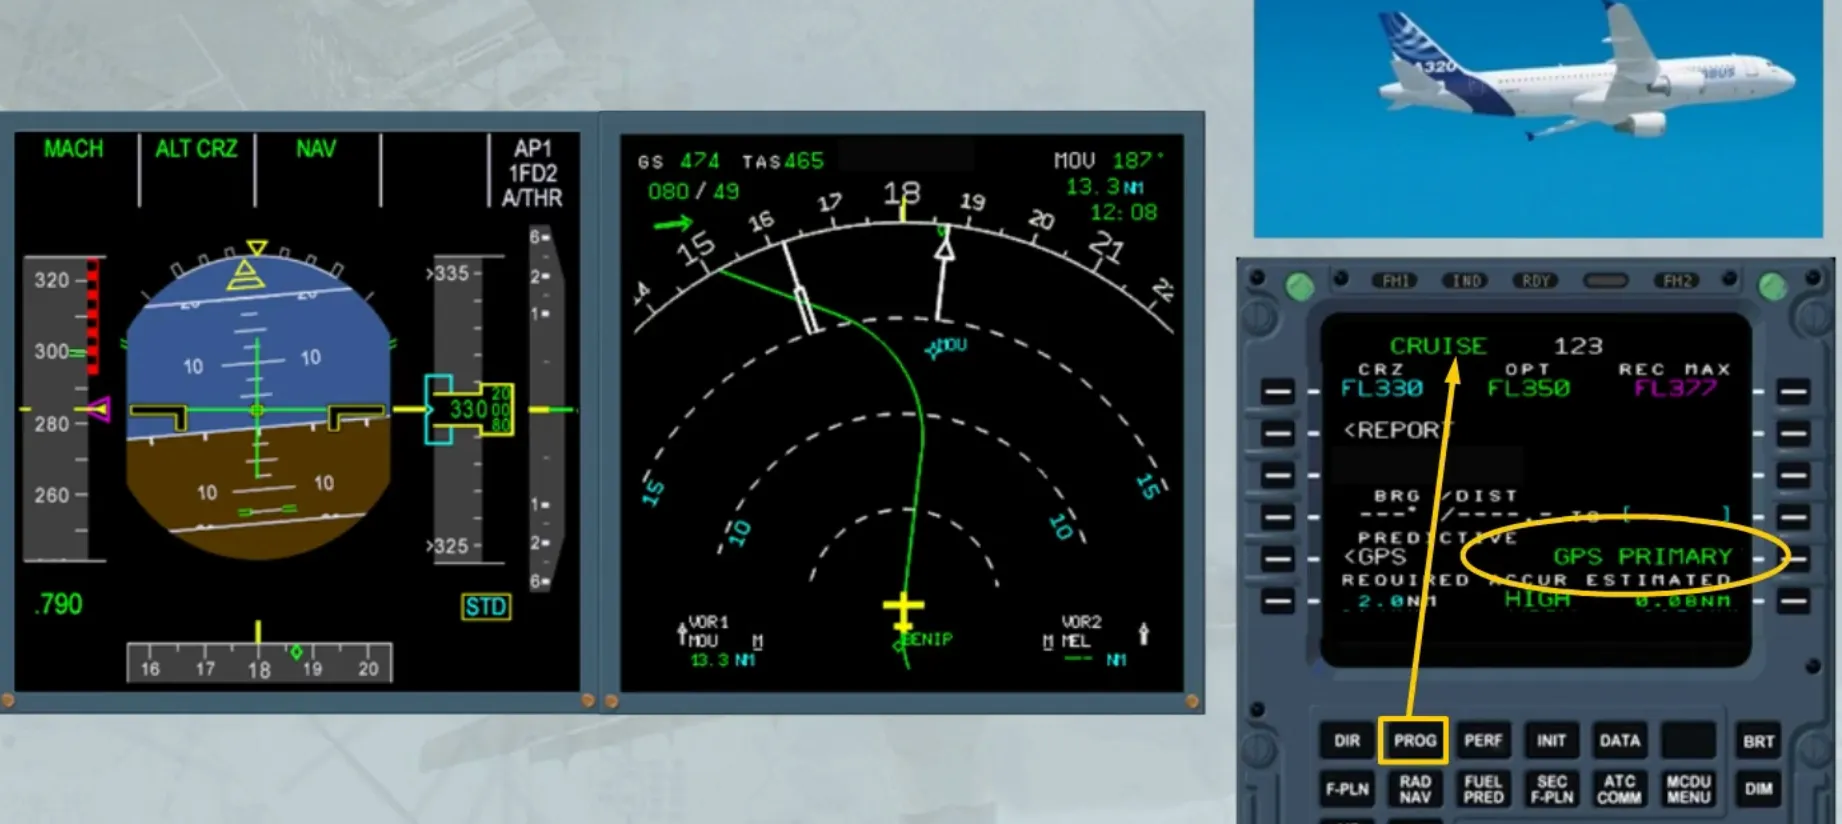
If your aircraft is equipped with GPS primary, no accuracy check is required as long as GPS primary is available. The GPS mode can be checked on the PROG page.
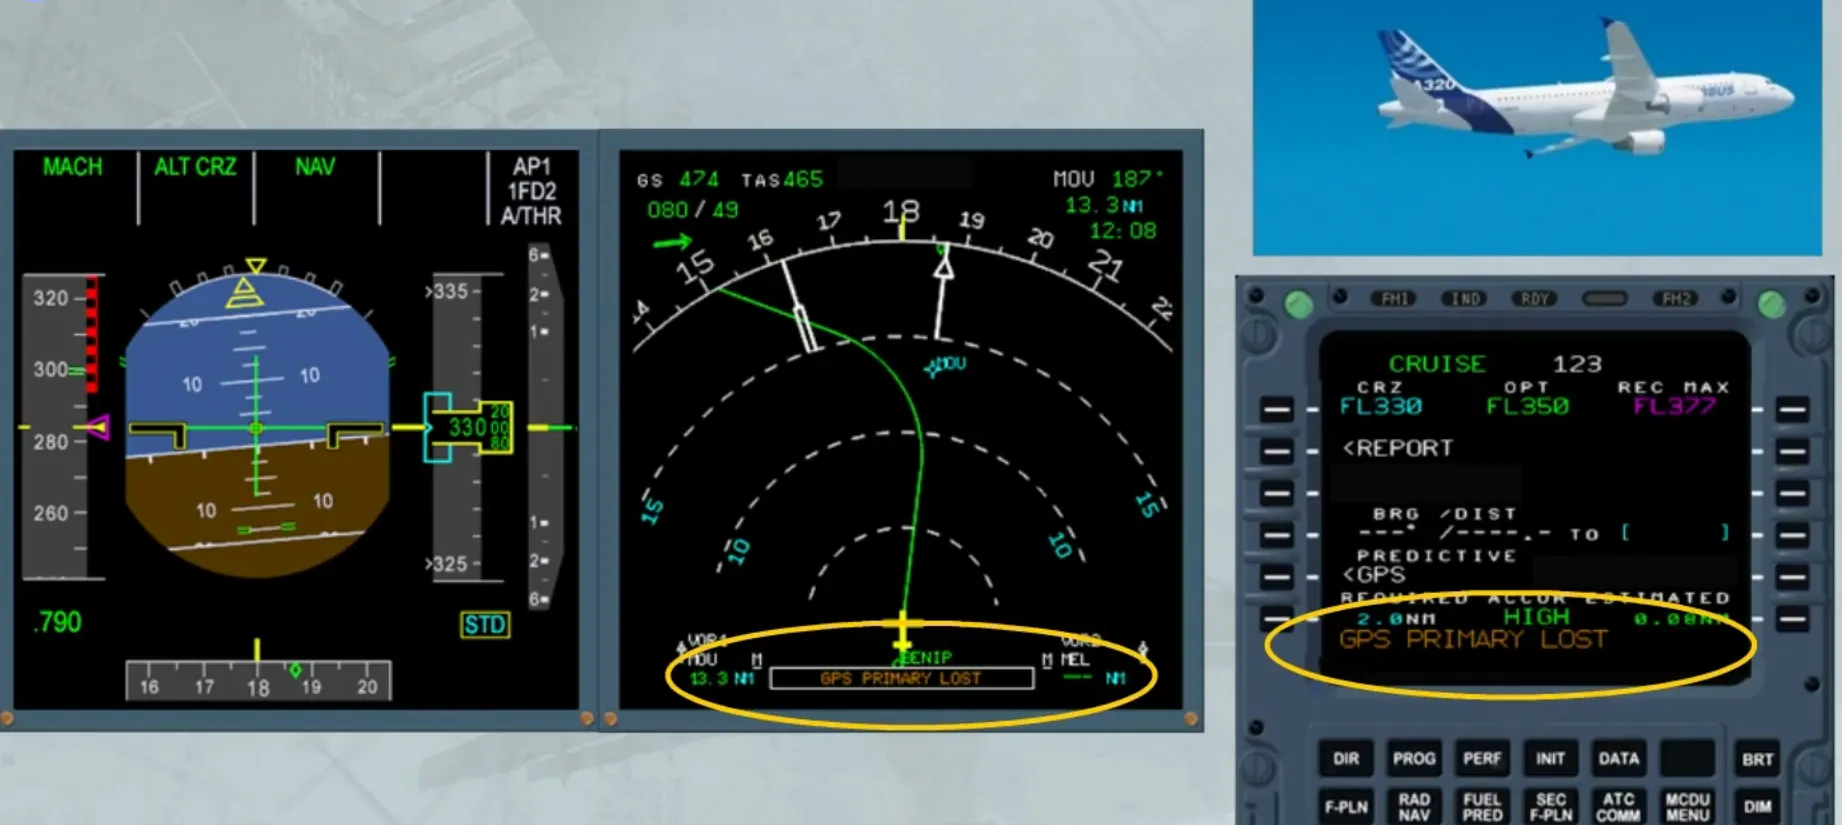
If the GPS is no longer primary, the message “GPS PRIMARY LOST” is displayed on the ND and in the MCDU scratchpad.
Notice that the navigation accuracy level stays at HIGH.
Nevertheless, the navigation accuracy has to be verified.
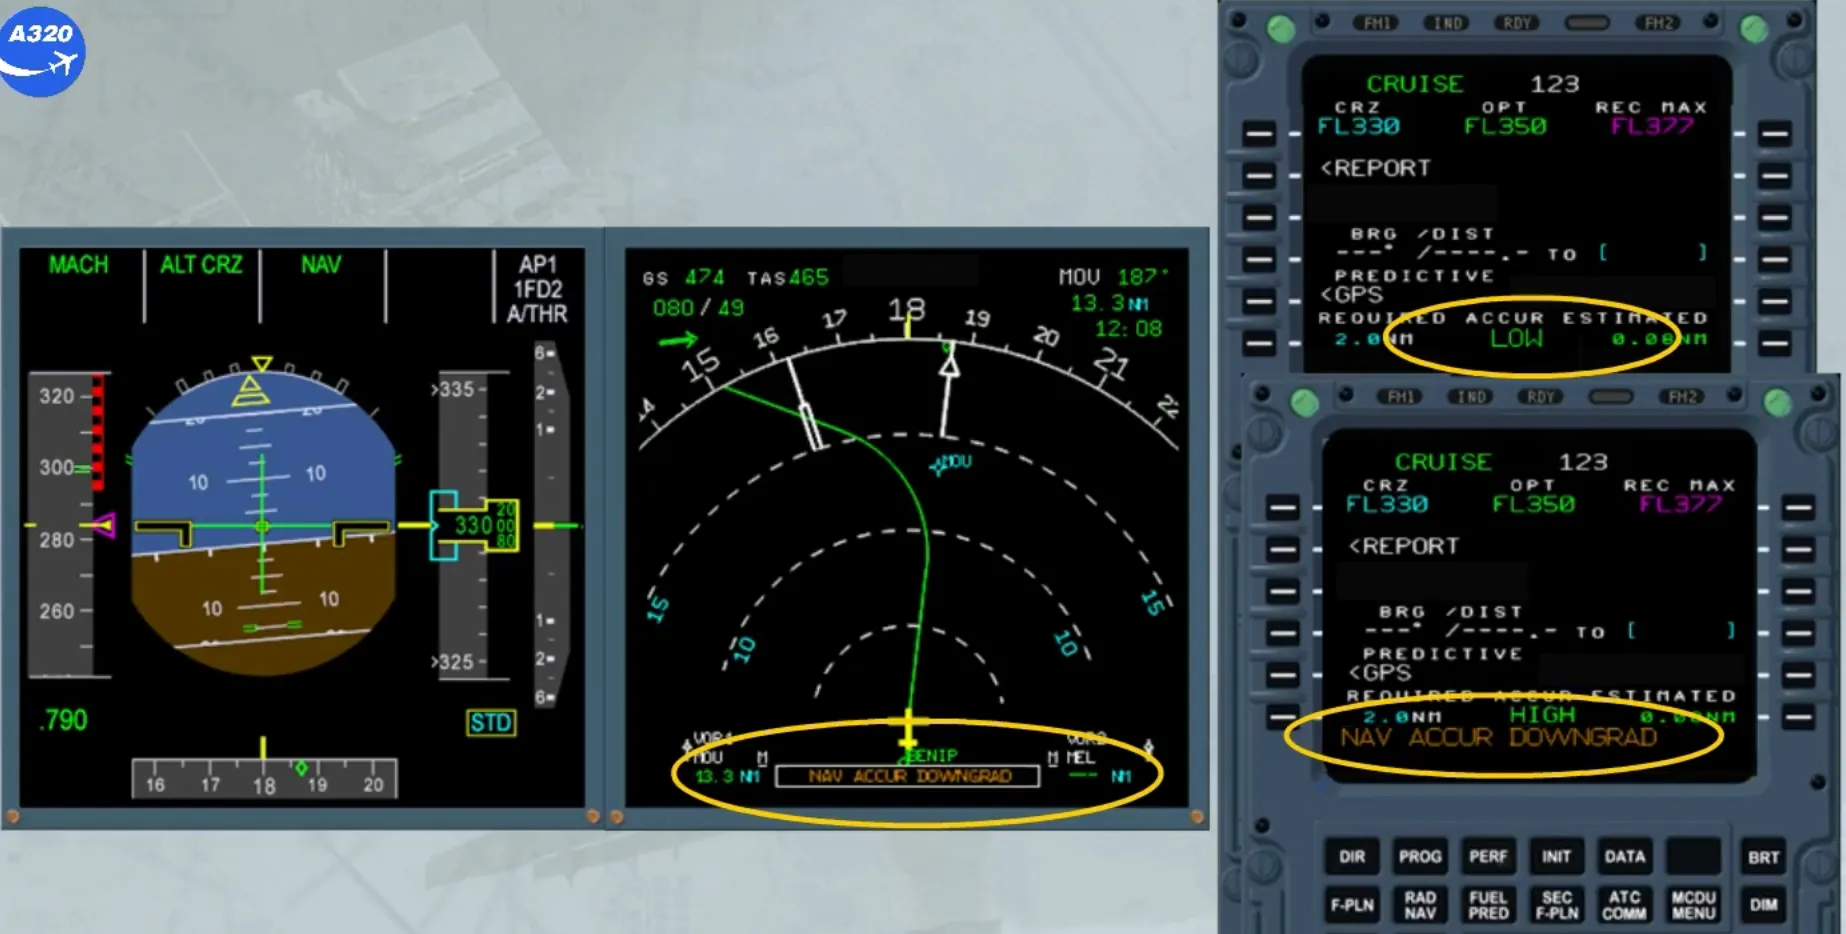
This check has to be performed whenever the following cases occur:
- IRS only navigation
- The PROG page displays LOW accuracy
- “NAV ACCUR DOWNGRAD” message appears on the MCDU and on the ND.
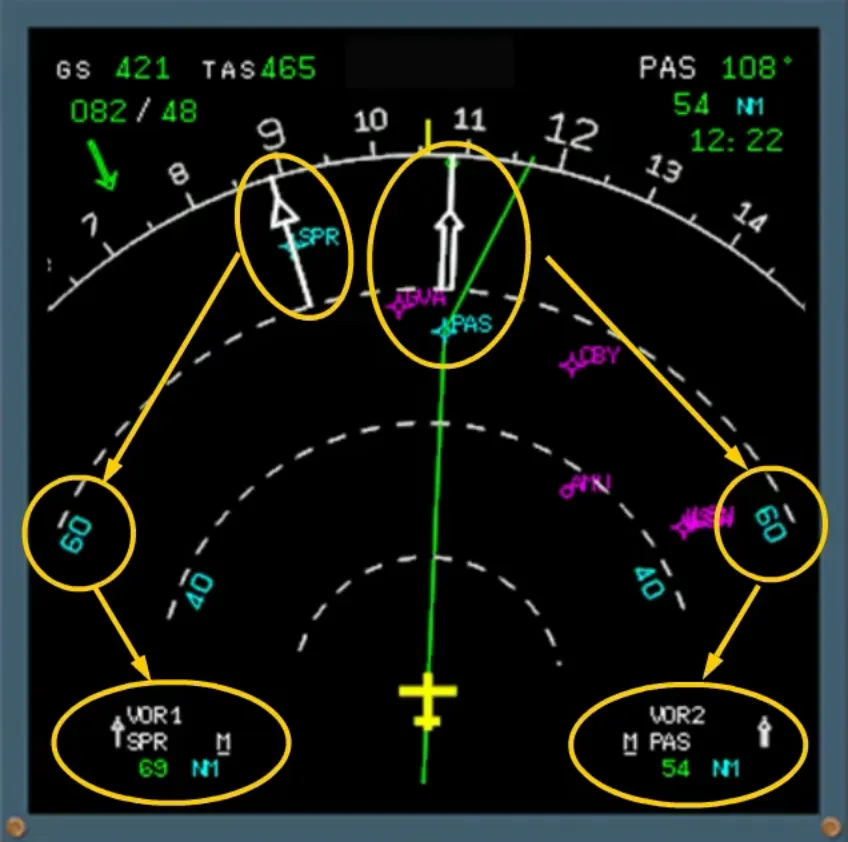
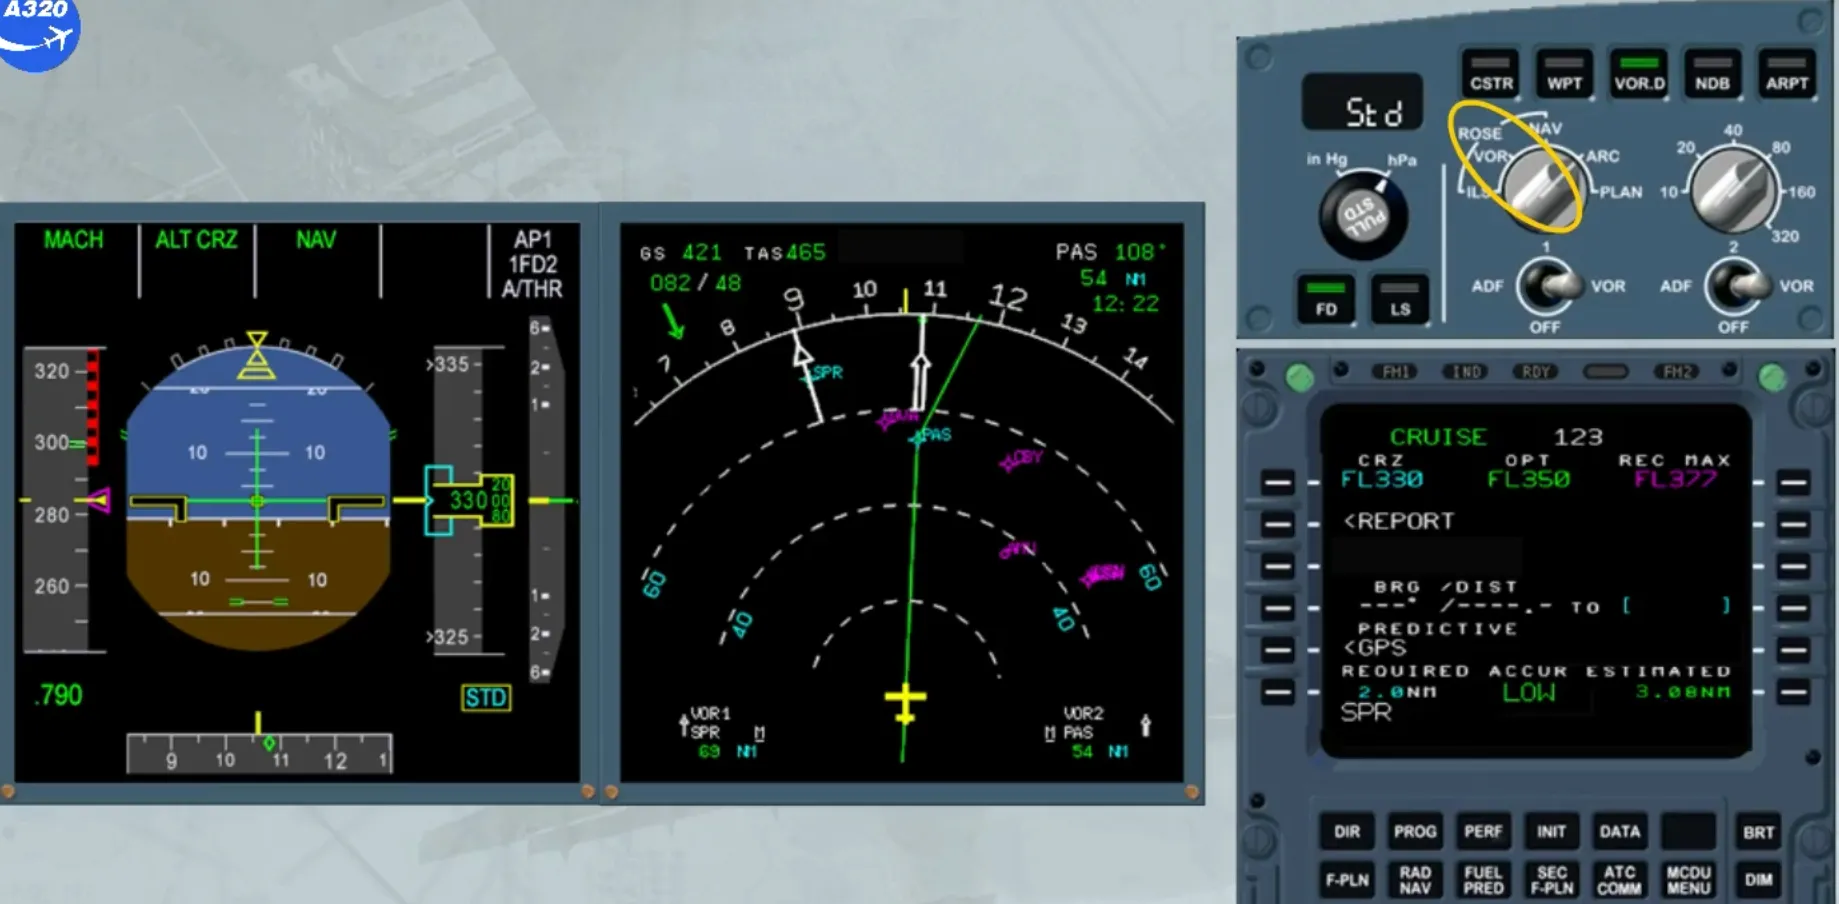
To perform this check, you have to use the selected navaids and display them on the ND.
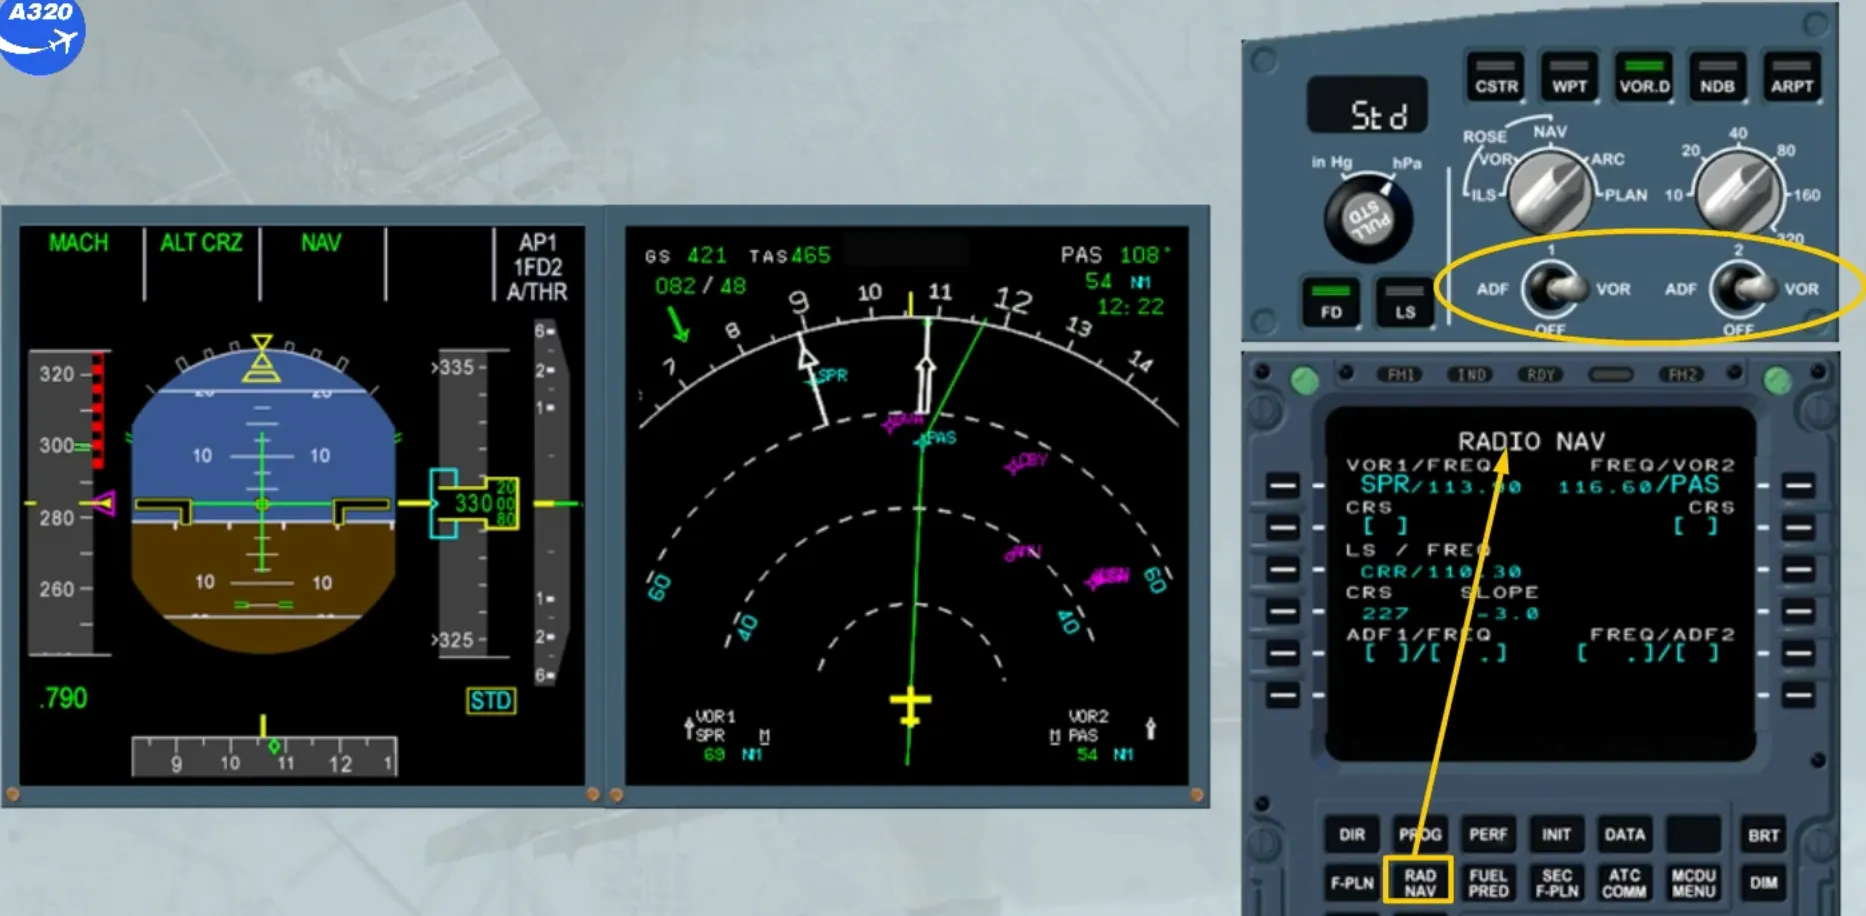
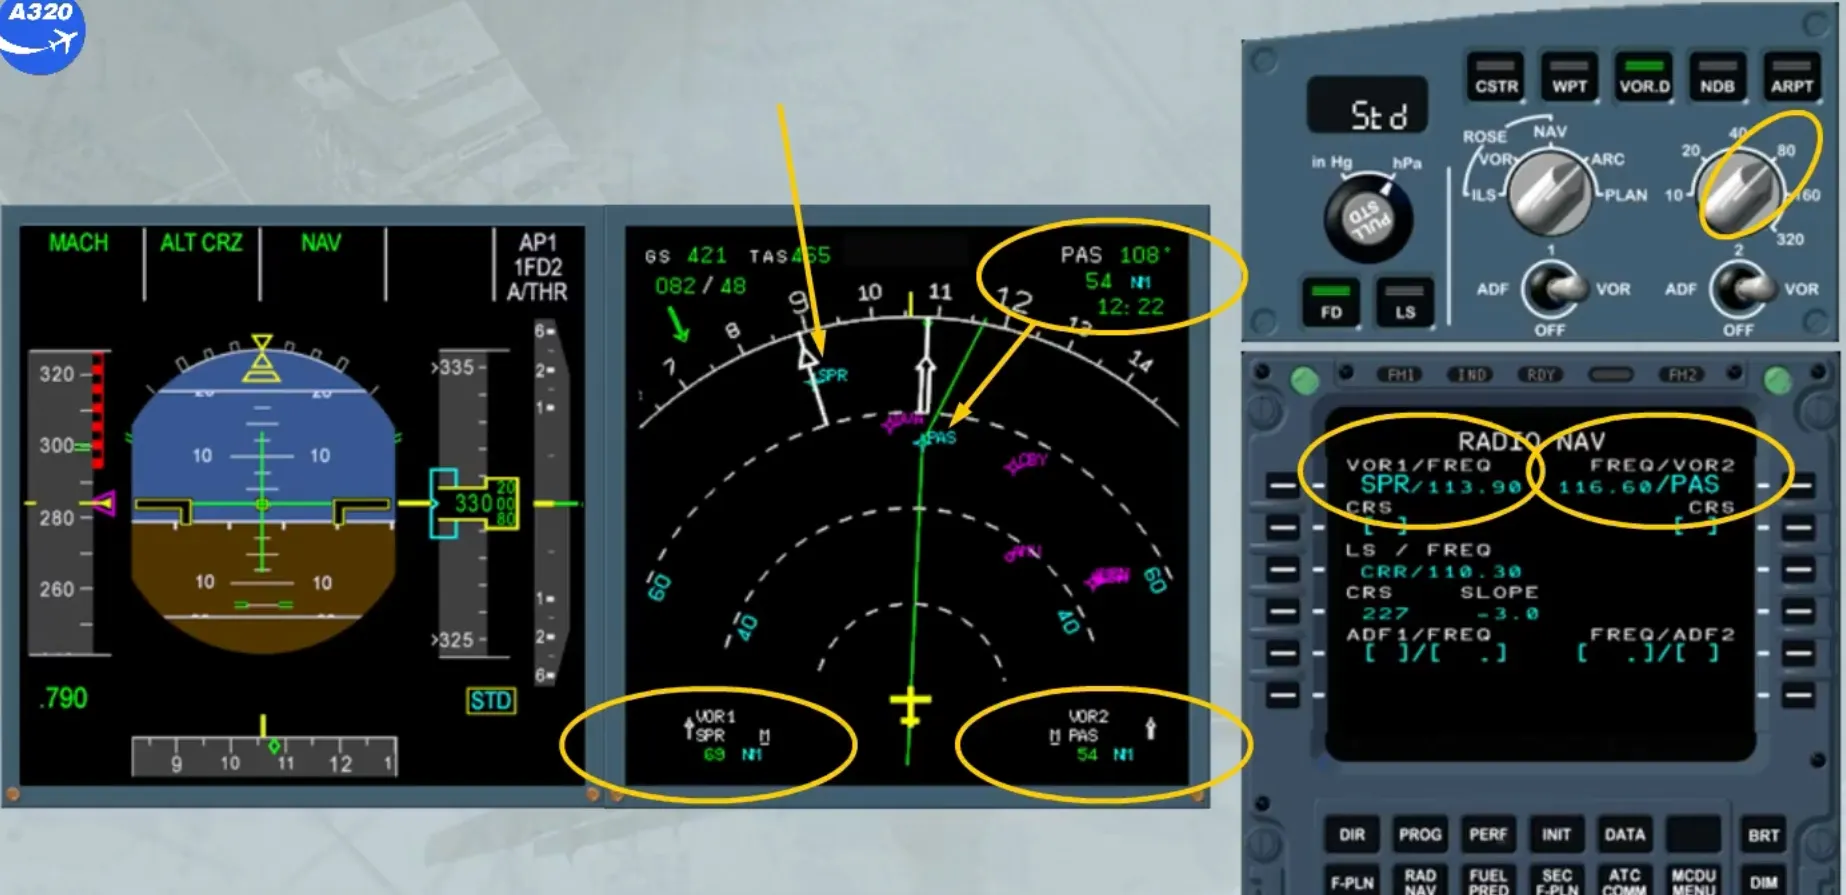
We have set the ND range to 80. The VOR “Sierra Papa Romeo” has been manually tuned on receiver 1 and the VOR “Papa Alpha Sierra” on receiver 2.
Note that the VOR “Papa Alpha Sierra” is the “TO” waypoint of the flight plan.
There are two ways to do this check.
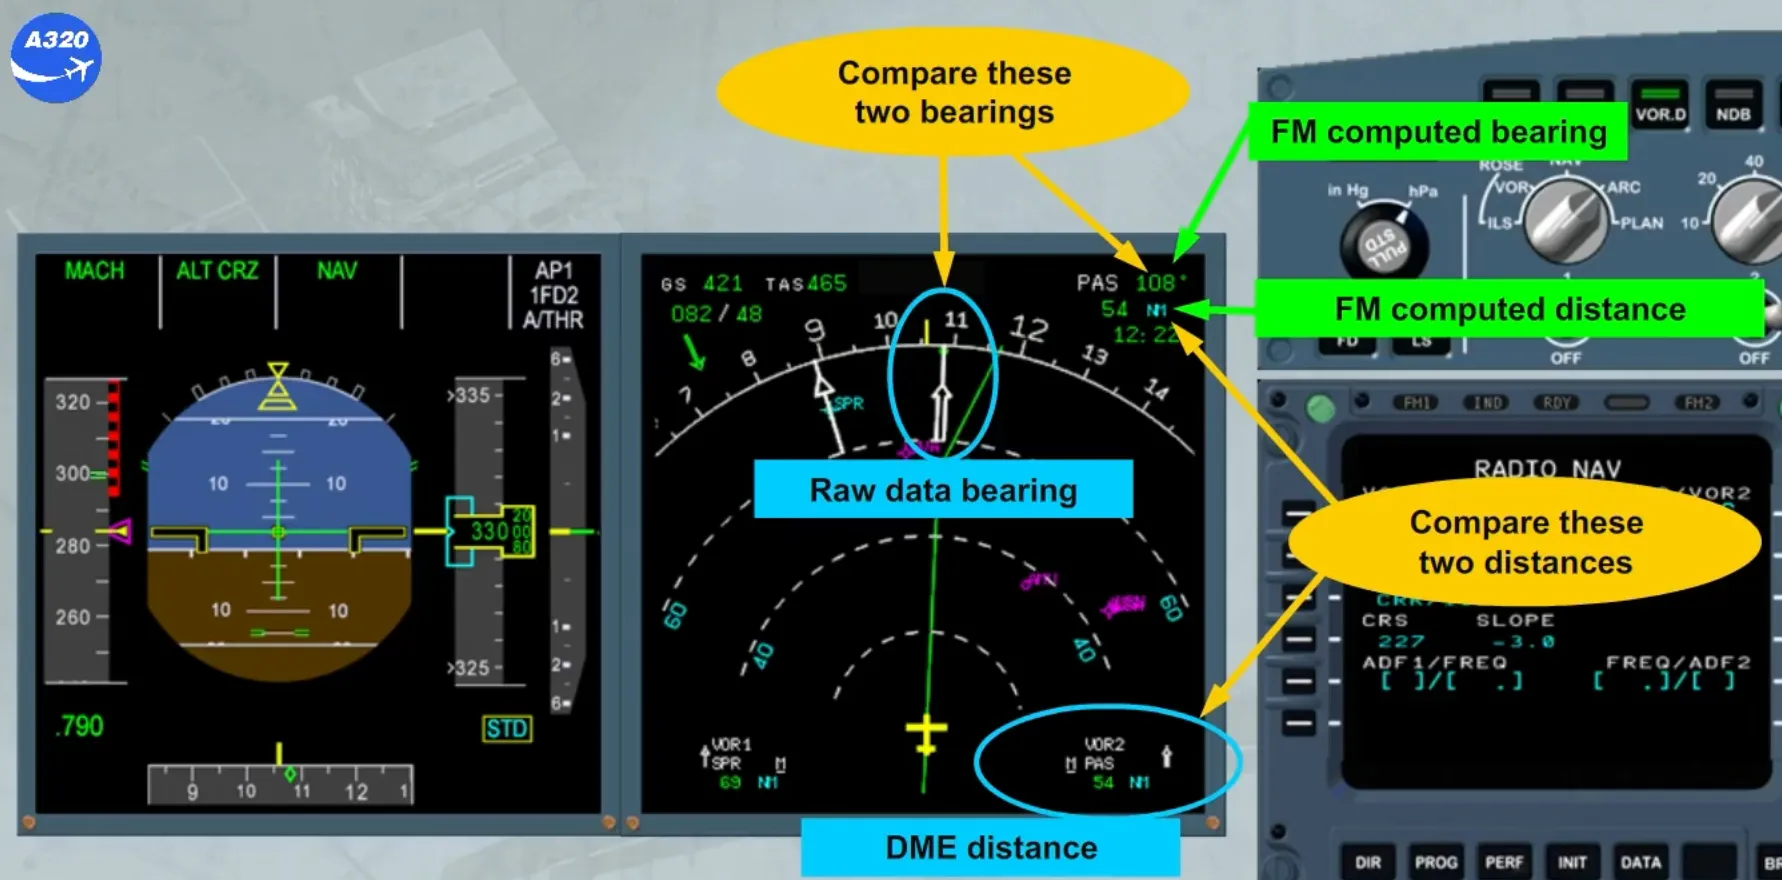
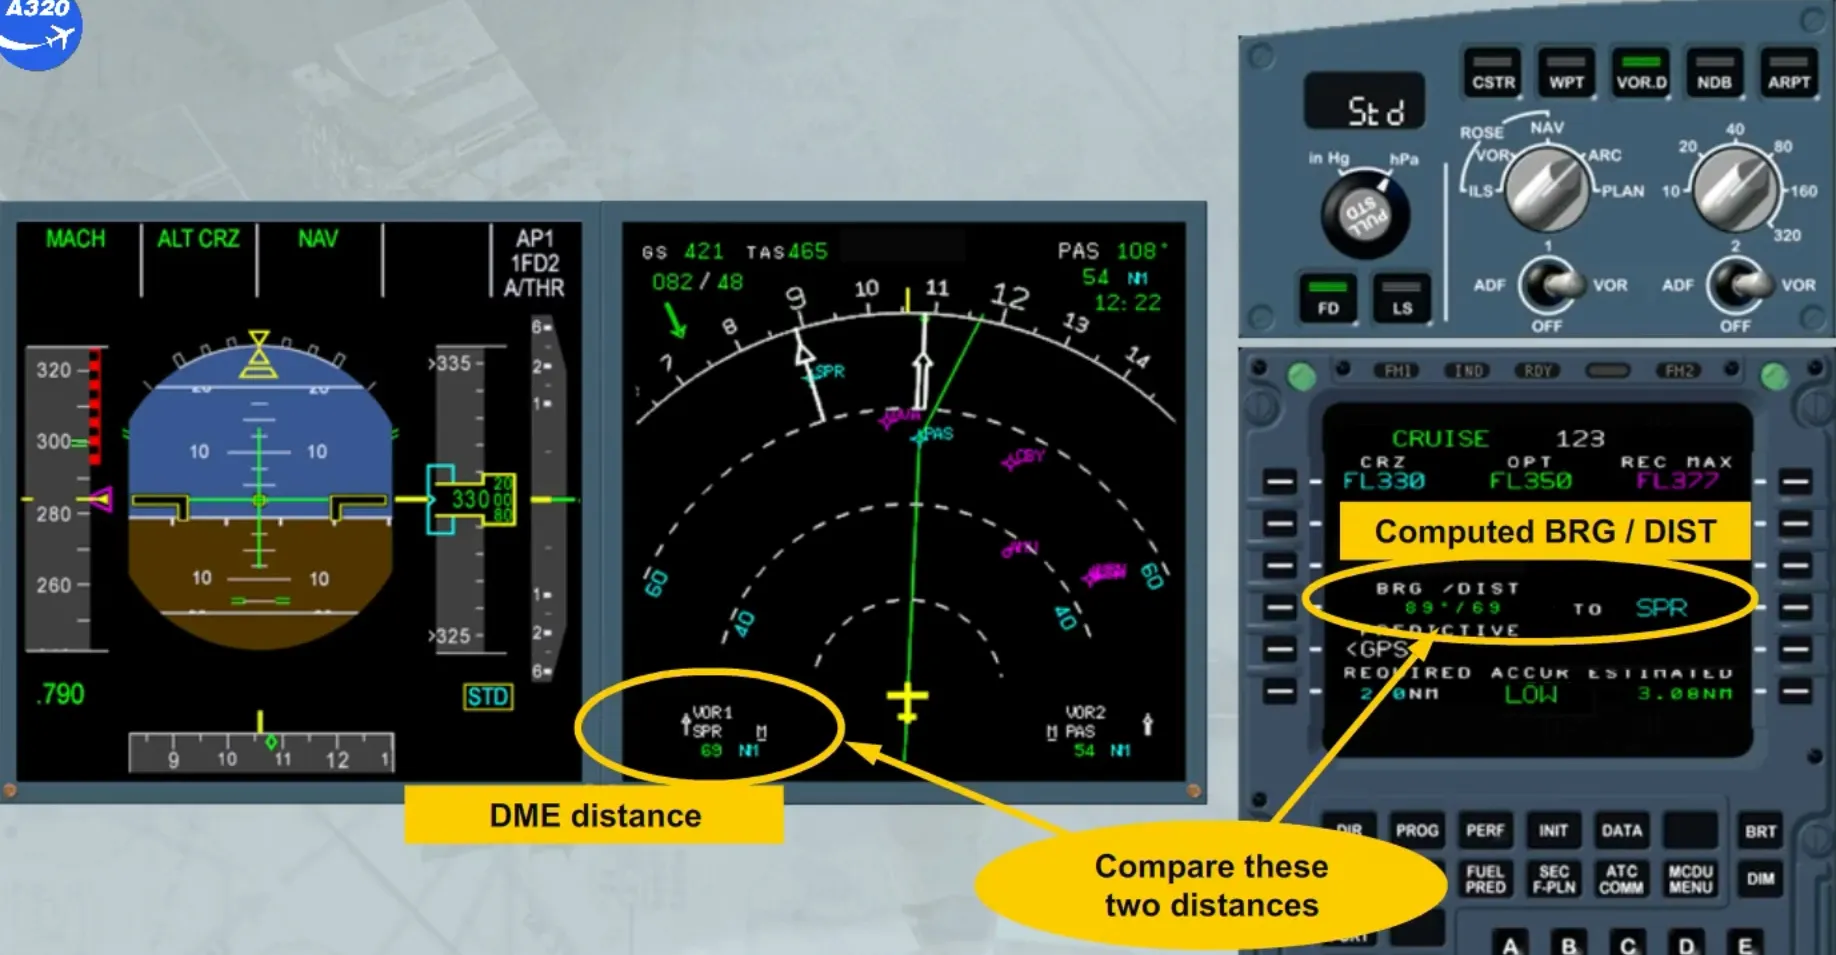
The first method is to compare the “TO” waypoint distance and bearing which is FM computed data with the corresponding navaid DME distance and bearing.
We have called the PROG page.
The second method is to insert a VOR/DME ident in the field “BRG/DIST TO” on the PROG page and to compare the computed BRG/DIST with the raw data on the ND.
We have typed the VOR/DME ident “SPR” in the scratchpad for you. We will insert it in “BRG / DIST TO” by pressing the LSK4R.
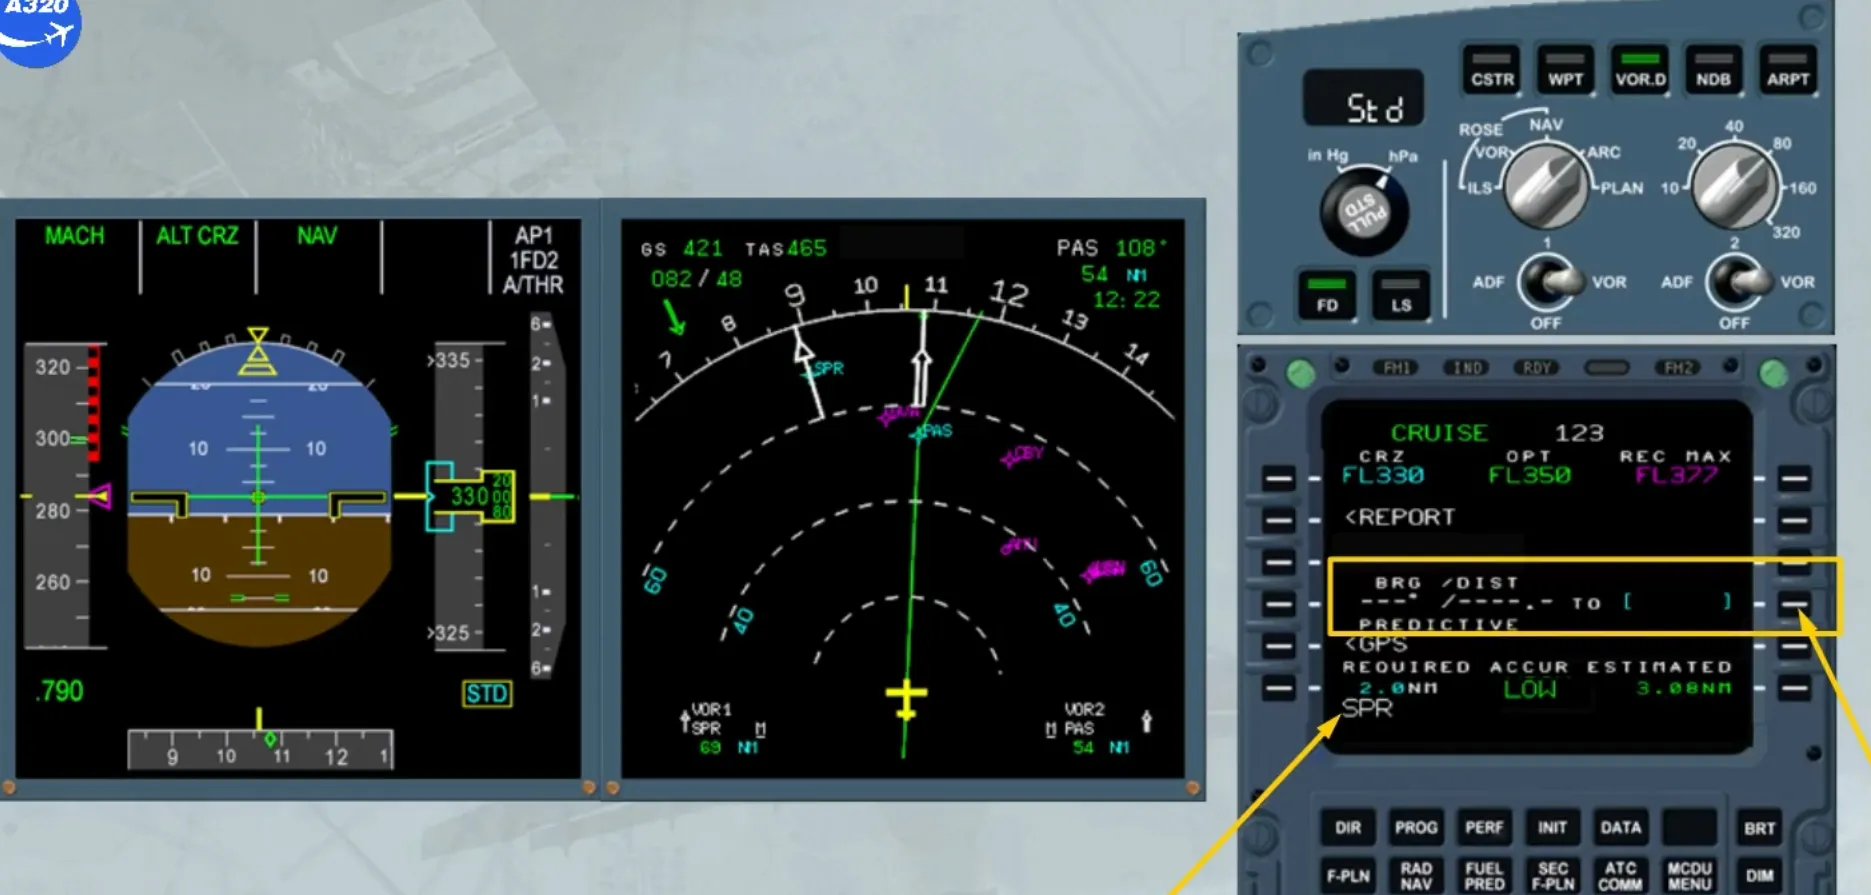
We now have, on the PROG page, the computed bearing and distance to the selected navaid.
The distances shown on the ND and on the PROG page can be compared.
The last method consists in checking that the raw data needle passes through the blue FMGS generated symbol for the VOR/DME, and that the position of this symbol corresponds to the DME distance.
Whatever method is used, if the error is less than 3 NM, the check is positive and the FM position is reliable. The SOP recommends to use the ND in ARC or NAV mode and managed lateral guidance.
If the error is greater than 3 NM, you can consider that the FM position is not reliable. In such a case, the SOP recommends to use raw data for navigation and to monitor it.
Module completed